Meta Description Concept: Unlock the secrets to making your store-bought basil last for months! Discover expert tips, step-by-step preservation methods, and hidden insights to keep your basil fresh, vibrant, and ready for any dish. Say goodbye to wasted herbs and hello to a kitchen full of aromatic possibilities.
Unlock the Secret: Make Your Store-Bought Basil Last for Months – A Culinary Game-Changer
Picture this: You’ve just bought a vibrant bunch of fresh basil, its aroma promising culinary adventures. You bring it home, tuck it into the fridge, and a mere day or two later, the dream turns into a wilted, blackened nightmare. Sound familiar? It’s a tragedy played out in kitchens worldwide, a silent testament to the fleeting beauty of this beloved herb.
But what if I told you that this disheartening ritual doesn’t have to be your reality? What if there was a way to defy the odds, to extend the life of your precious basil from days to *weeks*, even *months*? Imagine the convenience, the flavor, the sheer joy of having fresh, vibrant basil at your fingertips whenever inspiration strikes, without another trip to the grocery store.
This isn’t just about saving money, though it certainly does that. It’s about empowering you to reduce food waste, enhance your cooking, and transform your kitchen into a hub of sustainable culinary creativity. We’re about to dive deep into the often-misunderstood world of basil preservation, revealing methods that will revolutionize how you interact with this incredibly delicate, yet profoundly rewarding, herb. Get ready to turn basil black-thumb syndrome into a green-fingered triumph.
The Unspoken Tragedy: Why Basil Wilts So Fast (And What We Get Wrong)
Why is basil such a drama queen? Unlike hardier herbs like rosemary or thyme, basil is incredibly sensitive to its environment. It’s like a delicate flower, easily bruised and quick to succumb to temperature fluctuations, excess moisture, or even a lack thereof. Understanding its inherent fragility is the first step toward becoming its unlikely savior.
ADVERTISEMENT
Many of us make immediate, seemingly logical mistakes that inadvertently accelerate basil’s demise. We might shove it into the coldest part of the fridge, assuming chill equals freshness, only to find it blackening from cold shock. Or we might wash it thoroughly and then seal it in a container, unknowingly creating a humid, bacterial breeding ground. These common pitfalls stem from a lack of insight into basil’s unique physiology.
Basil’s leaves are tender and packed with water. This high water content, combined with its delicate cell structure, makes it highly susceptible to wilting from dehydration or collapsing from too much moisture. Moreover, basil produces and is sensitive to ethylene gas, a natural plant hormone that speeds up ripening and decay. Placing it near fruits like apples or bananas can be a death sentence.
The tragedy isn’t just about wilting; it’s also about the rapid loss of its signature aroma and flavor. The essential oils that give basil its distinctive peppery, sweet, and slightly minty notes are volatile, meaning they evaporate quickly. Improper storage accelerates this process, leaving you with flavorless, listless leaves. But here’s where it gets interesting: by understanding these vulnerabilities, we can develop a strategic defense. We’re not just fighting spoilage; we’re fighting for flavor integrity. And the battle begins the moment you bring that green goodness home.
The Basil Resurrection: Critical First Steps After Purchase
The moment your basil crosses the threshold of your kitchen is perhaps the most crucial for its long-term survival. Think of it as a delicate rescue mission. What you do in the first hour can dictate whether your basil thrives for weeks or succumbs within days. Most people skip these vital initial steps, but they are the bedrock of successful preservation.
ADVERTISEMENT
Resist the urge to just toss it into the fridge or leave it on the counter. Your basil has just undergone a stressful journey from farm to store shelf to your home. It needs immediate attention and a gentle touch to recover and prepare for its extended stay. This initial care isn’t just a suggestion; it’s a non-negotiable first phase in our basil preservation masterplan.
The Gentle Cleanse: Why Washing Matters (But Not Too Much)
Before you even think about storage, your basil needs a gentle clean. This isn’t about scrubbing; it’s about removing any dirt, residual pesticides, or even tiny hitchhiking insects. A quick rinse under cool, running water is all that’s required. Avoid letting it sit in a bowl of water, which can waterlog the leaves and accelerate spoilage. The key here is quick and efficient.
After rinsing, the absolute most critical step is drying. And by drying, I mean *thoroughly* drying. Excess moisture on the leaves is basil’s sworn enemy. It creates an ideal environment for bacterial growth and leads to that dreaded slimy texture and blackening. Lay your basil leaves out on a clean kitchen towel or paper towels and gently pat them dry. You can even use a salad spinner if you have one, ensuring you spin it until no visible water droplets remain. This might seem tedious, but it’s a non-negotiable step that sets the stage for success. Skip this, and you’re inviting trouble, no matter which brilliant preservation method you choose next.
The Initial Assessment: Inspecting Your Basil for Longevity
Once your basil is clean and dry, take a moment to inspect each sprig. Look for any leaves that are already bruised, discolored, or showing signs of wilting. These are the weak links in your basil chain, and they will only accelerate the decay of the healthier leaves around them. Don’t be sentimental; gently pinch off and discard any compromised leaves. It’s a necessary triage.
Also, trim the very ends of the stems, just like you would with fresh flowers. This opens up the capillaries of the stem, allowing for better water absorption if you plan to use a water-based preservation method. This small act of preparing the basil, removing any damaged parts, not only extends its life but also ensures that only the freshest, most vibrant leaves make it into your final storage solution, guaranteeing peak flavor and aroma when you’re ready to use them. Now that it’s prepped, cleaned, and assessed, let’s unlock the actual secrets to making it last.
ADVERTISEMENT
The Water Immersion Method: Basil’s First Line of Defense
For immediate freshness and short-term enjoyment, the water immersion method is a classic for a reason. It mimics how basil might absorb water in a garden, keeping its delicate leaves hydrated and perky. While it won’t preserve your basil for months, it’s an indispensable technique for extending its vibrancy for several days, bridging the gap between purchase and your first culinary creation. It’s simple, elegant, and often the first trick a seasoned chef or home cook will tell you about.
This method works by keeping the stems hydrated, allowing the leaves to continue drawing water, much like a cut flower in a vase. The critical elements here are clean water, a suitable container, and a mindful approach to its environment. But there are nuances to this seemingly straightforward technique that can make all the difference between a few extra days and a week of lush, green glory.
The Classic Vase Method: A Decorative Preservation Hack
This is perhaps the most well-known technique, and for good reason: it’s effective and aesthetically pleasing. First, trim the very ends of your basil stems at an angle, just as you would with flowers. This creates a fresh cut that can easily absorb water. Next, fill a small glass or jar with about an inch of fresh, cool water. Place your basil stems, cut-side down, into the water, ensuring that only the stems are submerged and no leaves are in contact with the water, as submerged leaves will quickly rot. Arrange the basil loosely to allow for air circulation.
Once your basil is happily hydrated, here’s the crucial step: cover the entire basil bunch, including the jar, loosely with a plastic bag. A clear plastic produce bag works perfectly. This creates a mini-greenhouse effect, trapping humidity around the leaves and preventing moisture loss through evaporation. Place this setup on your kitchen counter, away from direct sunlight and heat sources, but not in the fridge. Basil hates cold! The ideal temperature is room temperature, typically around 20-25°C (68-77°F). This method can keep your basil vibrant and fresh for up to a week, often even longer. Insider Tip: Change the water daily or every other day to prevent bacterial growth and ensure constant hydration. This simple act dramatically extends its life. The pros are its simplicity and visual appeal; the cons are its limited shelf life compared to other methods.
ADVERTISEMENT
The Fridge Hydration Technique: When Cool is King (Sometimes)
While basil generally despises cold, there’s a specific variation of the water method that can work for slightly longer storage, provided you manage the cold shock carefully. This technique is often confused with simply putting basil in the fridge, but it’s more nuanced. Begin by preparing your basil exactly as you would for the classic vase method: trim stems, place in a jar with an inch of water, and ensure no leaves are submerged.
However, instead of leaving it on the counter, you’ll place this setup inside your refrigerator. The key to preventing cold damage is to create a protective barrier. Loosely cover the entire basil and jar with a plastic bag, just as before. This bag acts as a shield, trapping a layer of warmer air around the basil and preventing direct exposure to the fridge’s harsh, dry cold. The plastic bag also maintains a higher humidity level, which basil loves, while the cooler temperature slows down the basil’s metabolism, thus extending its life. This method can potentially keep basil fresh for 1-2 weeks. It’s slightly riskier than the countertop method due to the cold sensitivity of basil, but for those who need a few extra days beyond the usual week, it can be a useful alternative. The main pro is slightly extended freshness; the main con is the risk of cold damage if not properly insulated. But what if you need more than a week? What if you envision a basil future spanning multiple weeks of vibrant flavor?
The Paper Towel Embrace: Sealing in Freshness for Weeks
If the water methods are about short-term hydration, the paper towel embrace is about creating a protective, moisture-balanced cocoon for your basil. This technique is a game-changer for those who want their basil to stay fresh and green for a couple of weeks, far surpassing the typical lifespan of counter-stored or even water-vase basil. It’s less about active hydration and more about preventing desiccation while avoiding excess dampness – a delicate balance that, once mastered, feels like magic.
The beauty of this method lies in its simplicity and efficiency. It doesn’t require any special equipment beyond what you likely already have in your kitchen. The secret is in controlling the humidity around the basil leaves, providing just enough moisture to keep them supple without encouraging rot. It’s the Goldilocks zone of basil storage, and when done correctly, it can feel like you’ve unlocked a hidden cheat code for culinary longevity.
ADVERTISEMENT
The Damp Paper Towel Roll-Up: A Simple Yet Powerful Strategy
This method begins, as always, with properly prepped basil. Ensure your basil is thoroughly washed and, crucially, absolutely dry. Any residual water on the leaves will lead to sliminess and spoilage. Lay your dry basil leaves out in a single layer on a sheet of paper towel. Don’t crowd them; give each leaf a little breathing room. Next, lightly dampen another sheet of paper towel – it should be moist, not dripping wet. You can achieve this by running it under the tap and then wringing out every last drop of excess water. The goal is just enough moisture to create a humid environment, not to saturate the basil.
Gently place the damp paper towel over the basil leaves, or carefully roll the basil up in the damp towel like a delicate cigar. Once wrapped, carefully place the entire bundle into a sealable plastic bag or an airtight container. The container is often preferred as it prevents the basil from being crushed. Place this sealed package in the crisper drawer of your refrigerator. The crisper drawer is typically designed to maintain a higher humidity level, making it an ideal spot for this method. This method can keep your basil incredibly fresh and vibrant for 2-3 weeks, sometimes even longer! Surprising Fact: The crispness of the drawer helps regulate humidity, preventing both dehydration and excess condensation, striking that perfect balance basil craves. The main pro is extended freshness; the main con is the initial effort of thoroughly drying the basil. But what if you have an abundance and want to save it for *months*, not just weeks? That’s when we turn to more robust, transformative techniques.
The Oil Infusion: Aromatic Preservation for Culinary Delights
When you have a bumper crop of basil or simply want to lock in its vibrant flavor for an extended period, moving beyond fresh storage becomes essential. The oil infusion method is a brilliant way to do this, transforming your fresh basil into a ready-to-use ingredient that can last for months in the freezer. It’s not just about preservation; it’s about creating culinary building blocks, imbued with basil’s aromatic essence, that elevate your cooking with minimal effort later on. This method effectively protects the delicate basil leaves from oxidation and freezer burn, preserving their color and intense flavor.
Using oil offers a protective barrier, sealing in the volatile compounds that give basil its distinctive taste and aroma. It’s an ingenious way to keep that peak-of-summer flavor alive even in the depths of winter. But there are crucial steps and important safety considerations, particularly regarding the risk of botulism, which we will address to ensure both deliciousness and peace of mind.
ADVERTISEMENT
Basil Pesto Cubes: The Ultimate Freezer Hack
Pesto is a classic use for abundant basil, but freezing it as cubes is the ultimate convenience hack. Start by blanching your basil leaves briefly (10-15 seconds) in boiling water, then immediately plunging them into an ice bath. This step helps set the vibrant green color and stops enzymatic action that can cause browning during freezing. Once cooled, squeeze out as much water as possible. For your pesto, blend blanched basil with olive oil, pine nuts (or walnuts for a cheaper alternative), Parmesan cheese (optional, as cheese can sometimes get grainy when frozen), and a pinch of salt. The critical safety note here: *do not add raw garlic* to pesto that will be stored in oil at room temperature or in the fridge for long periods, due to the risk of botulism. If freezing, the risk is minimal, but for ultimate safety, add fresh garlic when you use the frozen pesto.
Once blended to your desired consistency, spoon the pesto into ice cube trays. These small portions are perfect for individual servings, preventing waste and making it easy to pop out just what you need. Freeze the trays until the cubes are solid, usually a few hours. Once frozen, pop the pesto cubes out of the trays and transfer them to a freezer-safe bag or airtight container. Label with the date. These pesto cubes can last for 6-12 months in the freezer, ready to be dropped into pasta, soups, or stews for an instant burst of summer flavor. The pros are incredible convenience and long shelf life; the cons include the initial prep time and the need for a freezer.
Oil-Packed Basil Leaves: Simple, Savory, and Long-Lasting
For those who want to preserve the basil leaves themselves in oil, rather than making pesto, this method is ideal. It involves a similar blanching step to maintain color and halt enzymes. Gather your fresh basil leaves, wash them, and again, thoroughly dry them. This step is non-negotiable for safety. Next, blanch the basil leaves in boiling water for about 10-15 seconds. Immediately transfer them to an ice bath to stop the cooking process and preserve their vibrant green hue.
Once cooled, again, squeeze out as much excess water as humanly possible. Water is the enemy of oil preservation. Lay the blanched, dried basil leaves in a single layer on a baking sheet lined with parchment paper and freeze them individually. This “flash freezing” prevents them from clumping together. Once frozen solid, transfer the individual leaves to a freezer-safe bag or airtight container. Now, for the oil part: when you’re ready to use them, you can either drop the frozen leaves directly into hot oil for cooking or, for longer-term infused oil, layer them into a clean, sterile jar and cover completely with olive oil. Store this oil-packed basil in the refrigerator for up to a few weeks, or in the freezer for several months. Important: If storing in the fridge, always keep it submerged in oil and avoid adding raw garlic or other low-acid ingredients that can create anaerobic conditions for botulism. For safety and maximum longevity, freezing the oil-packed leaves is highly recommended. Insider Tip: The leftover oil from this process can be used as a delicious basil-infused oil for dressings or dipping! The pros are retaining whole leaf integrity and versatility; the cons are the meticulous blanching and drying steps and the safety considerations if not frozen. But what if you want to use it like a dried herb, crumbled into dishes for concentrated flavor? Let’s explore the art of desiccation.
ADVERTISEMENT
The Art of Desiccation: Drying Basil for Pantry Staples
While fresh basil offers a vibrant, herbaceous punch, dried basil provides a concentrated, mellow flavor that’s perfect for slow-cooked dishes, sauces, and spice blends. Drying basil is one of the oldest preservation methods, stripping away moisture to inhibit spoilage and intensify flavor. It transforms the delicate leaves into a pantry staple, ready to impart warmth and depth to your cooking for many months. This method is incredibly satisfying, as you take full control of the transformation, ensuring a high-quality, flavorful dried herb far superior to many store-bought varieties.
The key to successful drying lies in removing moisture quickly and thoroughly without “cooking” the basil, which would diminish its essential oils and vibrant color. Whether you choose the traditional air-drying method, the speed of an oven, or the precision of a dehydrator, understanding the optimal conditions is crucial. Each technique offers its own advantages, appealing to different levels of commitment and available equipment. Let’s explore which drying method is right for your kitchen.
Air Drying: The Traditional & Easiest Method
Air drying is the most ancient and perhaps the simplest method, requiring no special equipment beyond a string and a good spot. Begin by washing your basil sprigs and shaking off as much excess water as possible. Pat them gently with a paper towel. Gather small bunches of basil (about 4-6 sprigs per bunch) and tie them together securely at the stems with kitchen twine or rubber bands. Ensure the bunches aren’t too large, as this can trap moisture and lead to mold.
Hang your basil bunches upside down in a warm, dry, well-ventilated area away from direct sunlight. A pantry, a corner of the kitchen, or even a closet with good air circulation can work. Direct sunlight will bleach the leaves and degrade their flavor. The drying process can take anywhere from one to four weeks, depending on the humidity of your environment. You’ll know the basil is fully dry when the leaves are brittle and crumble easily between your fingers. Once dry, strip the leaves from the stems and store them in an airtight container away from light and heat. Pros: No special equipment, retains good flavor. Cons: Takes time, requires a suitable drying environment, susceptible to dust or humidity if not careful.
ADVERTISEMENT
Oven Drying: The Quick Fix for Busy Cooks
If patience isn’t your virtue, or you live in a humid climate where air drying is impractical, oven drying offers a much faster alternative. Preheat your oven to its lowest possible setting, typically around 50-70°C (125-150°F). If your oven runs hot even on its lowest setting, you might need to prop the oven door open slightly with a wooden spoon to allow moisture to escape and prevent the basil from cooking instead of drying. Wash and thoroughly dry your basil leaves. Arrange them in a single layer on a baking sheet. Don’t overlap them, as this will hinder even drying.
Place the baking sheets in the preheated oven. Check the basil every 15-30 minutes, turning the leaves occasionally to ensure even drying. The drying process typically takes 1-3 hours, but this can vary significantly depending on your oven and the thickness of the basil leaves. The basil is dry when it crumbles easily. Let the leaves cool completely before crumbling them and storing them in an airtight container. Pros: Much faster than air drying, suitable for humid climates. Cons: Requires constant monitoring, risk of cooking/browning if oven is too hot or left too long, may slightly diminish flavor compared to slower methods.
Dehydrator Drying: Precision and Efficiency
For those who are serious about herb preservation, a food dehydrator offers the most precise and efficient drying method. Dehydrators are designed to circulate low, consistent heat, removing moisture evenly and thoroughly without compromising flavor or color. Wash and thoroughly dry your basil leaves. Arrange them in a single layer on the dehydrator trays, ensuring good airflow around each leaf.
Set your dehydrator to a low temperature, usually around 35-45°C (95-115°F). The exact temperature can vary based on your model, so consult your dehydrator’s manual. Drying time in a dehydrator typically ranges from 4-12 hours. Check the basil periodically; it’s ready when the leaves are brittle and snap easily. Once fully dry, allow them to cool completely before transferring them to an airtight container. Store in a cool, dark place. Pros: Most consistent and effective drying, preserves color and flavor well, hands-off once set. Cons: Requires specific equipment, initial investment. Now that we know the methods, let’s address the common pitfalls and how to avoid them on your journey to basil mastery.
ADVERTISEMENT
Troubleshooting Basil Blues: Common Problems and Their Solutions
Even with the best intentions and the most meticulous preparation, sometimes basil just doesn’t cooperate. Leaves turn black, become slimy, or lose their vibrant flavor. These “basil blues” can be incredibly frustrating, leading many to abandon long-term preservation efforts altogether. However, understanding the root causes of these common problems is the key to preventing them and ensuring your basil stays beautiful and delicious. Think of these issues not as failures, but as signals guiding you towards perfecting your technique. Let’s decode these warning signs and equip you with the solutions.
Often, these problems stem from a single, critical misstep in handling or storage conditions. Identifying that misstep can dramatically improve your success rate. This section is your go-to guide for transforming basil mishaps into learning opportunities, ensuring that your precious herb not only lasts longer but maintains its quality throughout its extended life. Don’t let a few bad batches deter you; learn from them and watch your basil game ascend to new heights.
Why Basil Turns Black: Understanding Oxidation and Cold Shock
The dreaded blackening of basil leaves is one of the most common and disheartening problems. There are two primary culprits: oxidation and cold shock. Oxidation occurs when the delicate compounds in basil react with oxygen, causing discoloration. This is why basil exposed to too much air or roughly handled can turn dark. The solution here is proper sealing – whether in a plastic bag, an airtight container, or submerged in oil – to minimize air exposure.
More often, however, blackening is due to cold shock. Basil is a warm-weather plant, highly sensitive to cold temperatures below 10°C (50°F). Storing it directly in the coldest part of your refrigerator without protection is a common mistake. The basil’s cell walls break down in the cold, releasing enzymes that react and turn the leaves black. To prevent this, avoid placing basil in the coldest parts of your fridge. If you must refrigerate, use the warmest section (often the door or top shelf) and always place it in a plastic bag or container to create an insulating barrier. For methods involving freezing, blanching the basil first (as in the oil infusion method) denatures these enzymes, preventing blackening upon thawing. Understanding these two mechanisms empowers you to choose the right storage environment for your basil and avoid its premature demise. It’s a simple shift in understanding that makes a world of difference.
ADVERTISEMENT
Slimy Leaves: The Peril of Excess Moisture
If your basil leaves turn slimy, you’ve likely encountered the peril of excess moisture. While basil needs hydration to stay fresh, having standing water on its leaves or storing it in an overly humid, unventilated environment creates a breeding ground for bacteria and mold. This is why the “thoroughly dry” step is emphasized so heavily in most preservation methods. A wet leaf sealed in a bag without proper air circulation is a recipe for disaster.
Causes include not drying basil properly after washing, storing it in an unventilated container where condensation builds up, or placing it in an area prone to high humidity without proper air circulation. To prevent slimy leaves, always ensure your basil is bone-dry before storing it, especially when using the paper towel or bag methods. When using the water vase method, make sure no leaves are submerged. For refrigerated storage, ensure the container or bag isn’t entirely airtight to allow for a tiny bit of air exchange, or incorporate a dry paper towel to absorb excess condensation. Regular inspection and quickly removing any affected leaves can also prevent the spread of slime to healthy leaves. This seemingly small detail is paramount; master the art of drying, and you’ll banish slime from your basil for good.
Loss of Flavor: How to Retain Basil’s Essence
Beyond visual cues, the most heartbreaking basil problem is the loss of its iconic, potent flavor. This often happens because the volatile aromatic compounds that give basil its distinctive taste evaporate or degrade over time, especially when exposed to heat, light, or air. Dried basil, while convenient, will never match the fresh intensity, but even fresh basil can become bland if not stored properly.
To retain basil’s essence, prioritize methods that protect it from these degradative factors. Freezing, especially in oil (like pesto cubes or blanched leaves in oil), is highly effective because the cold temperatures slow down the degradation of aromatic compounds, and the oil creates an anaerobic barrier. Drying methods, particularly dehydrating at low temperatures, aim to remove water while preserving these compounds. Air drying in a dark place also helps. Avoid storing fresh basil near heat sources or in direct sunlight. Always store preserved basil in airtight containers, away from light and heat, to lock in its precious flavor. Regularly inspect your stored basil; if it’s lost its vibrant aroma, it’s a sign that its peak flavor has passed. With these hurdles cleared, how do we choose the *perfect* method for *our* specific needs and lifestyle?
ADVERTISEMENT
Choosing Your Basil Preservation Path: A Decision Matrix
Now that you’re armed with a comprehensive arsenal of basil preservation techniques, the next logical question is: which one is right for you? The “best” method isn’t universal; it depends entirely on your immediate needs, how quickly you plan to use the basil, your available equipment, and your personal culinary habits. Think of it as a strategic decision, where you match the method to the anticipated usage, ensuring minimal waste and maximum enjoyment. This decision matrix will help you navigate the options and confidently choose the path that yields the best results for your unique situation.
Each method offers distinct advantages and trade-offs in terms of effort, longevity, and the final texture/flavor profile of the preserved basil. By carefully considering these factors, you can optimize your basil preservation strategy, making it a seamless and satisfying part of your kitchen routine. No more guesswork, just smart, informed choices that keep your basil perfectly poised for culinary action. Let’s break down the choices based on how long you need your basil to last.
Short-Term Freshness (Days to 1 Week)
If your goal is to keep basil fresh and perky for just a few days, perhaps to use in a salad or as a garnish within the week, the simplest and most visually appealing methods are your go-to. These techniques prioritize retaining the basil’s vibrant, delicate texture and fresh aroma, making it ideal for immediate culinary applications where its raw beauty shines.
-
The Classic Vase Method: Perfect for basil you plan to use within 5-7 days. It keeps the basil hydrated and visibly appealing on your countertop, serving as both a fresh ingredient and a charming kitchen decor. Remember the plastic bag “humidity dome” and daily water changes for optimal results. This method is best for small to medium bunches of basil.
-
The Fridge Hydration Technique: A good option if you need an extra few days beyond the countertop method, pushing towards 7-10 days. The cooler temperature slows decay, but the plastic bag is crucial to prevent cold shock. Use this if your kitchen counter gets too warm or if you simply prefer to keep it tucked away. It’s a slightly riskier play, but often yields results when managed carefully. These methods are low effort and provide maximum “fresh-from-the-garden” appeal, perfect for quick consumption.
For these short-term solutions, minimal processing is key. You’re aiming to gently extend the basil’s natural lifespan, keeping it as close to its original state as possible. The primary advantage is ease of access and the pristine quality of the leaves. But what if your basil journey needs to last a little longer, perhaps for a specific recipe next week, or just to stock up?
ADVERTISEMENT
Medium-Term Freshness (1-3 Weeks)
When your culinary plans extend beyond a week, or you’ve bought a larger bunch of basil, you need methods that offer a bit more staying power without resorting to long-term freezing or drying. The aim here is to maintain a near-fresh quality for several weeks, making it convenient for regular use in everyday cooking, from pasta sauces to roasted vegetables. These techniques require slightly more initial effort but pay dividends in extended freshness and reduced waste.
-
The Damp Paper Towel Roll-Up: This is arguably the champion for medium-term freshness, reliably keeping basil vibrant for 2-3 weeks, sometimes even longer. The crucial factor is starting with bone-dry basil and using a just-damp towel inside a sealed bag or container in the crisper drawer. This method effectively balances humidity, preventing both wilting and sliminess. It’s excellent for storing larger quantities of fresh leaves.
-
Freezing Whole Leaves (Briefly): While we’ll discuss longer-term freezing, you can briefly freeze whole, blanched leaves. After blanching and thoroughly drying, flash freeze them on a baking sheet and then transfer to an airtight bag in the freezer. This preserves them for a few weeks if you need whole leaves and aren’t quite ready for a long-term oil preservation or drying. This is a stop-gap measure that buys you time. These methods require a bit more planning than short-term options but are still relatively quick, providing a good balance between effort and extended fresh quality. But what if you have an abundant harvest or want basil through the winter? Then it’s time to think long-term.
Long-Term Storage (Months)
This is where you truly become a basil preservation master. For those times you have a massive harvest, want to stock up, or simply ensure a continuous supply of basil throughout the year, long-term methods are your best friends. These techniques fundamentally alter the basil’s state but lock in its flavor for months, making it a reliable pantry or freezer staple. The trade-off for longevity is often a change in texture or a slightly different flavor profile compared to fresh, but the convenience and availability are unparalleled.
-
Freezing (Pesto Cubes or Blanched Leaves in Oil): This is the gold standard for preserving basil’s vibrant color and robust flavor for up to 6-12 months. Pesto cubes are incredibly convenient for adding a burst of flavor to dishes. Blanched leaves in oil or flash-frozen plain leaves also work beautifully. The key is blanching (to set color and enzymes) and thorough drying before freezing or infusing in oil. This method is fantastic for cooked dishes where a tender texture isn’t paramount, but fresh flavor is desired.
-
Drying (Air, Oven, or Dehydrator): For a different culinary application, drying transforms basil into a concentrated herb perfect for slow-cooked sauces, stews, or spice blends. Dried basil has a more earthy, concentrated flavor and a crumbly texture. It can last for 6-12 months or even longer in an airtight container in a cool, dark place. Choose air drying for simplicity, oven drying for speed, or a dehydrator for precision. This method is ideal for those who prefer to use basil in its dried form and want a shelf-stable option. The journey of basil mastery doesn’t just begin when you buy it; it can also begin with planting it. But what if the journey begins even before you buy it? Let’s explore cultivating your own everlasting basil supply.
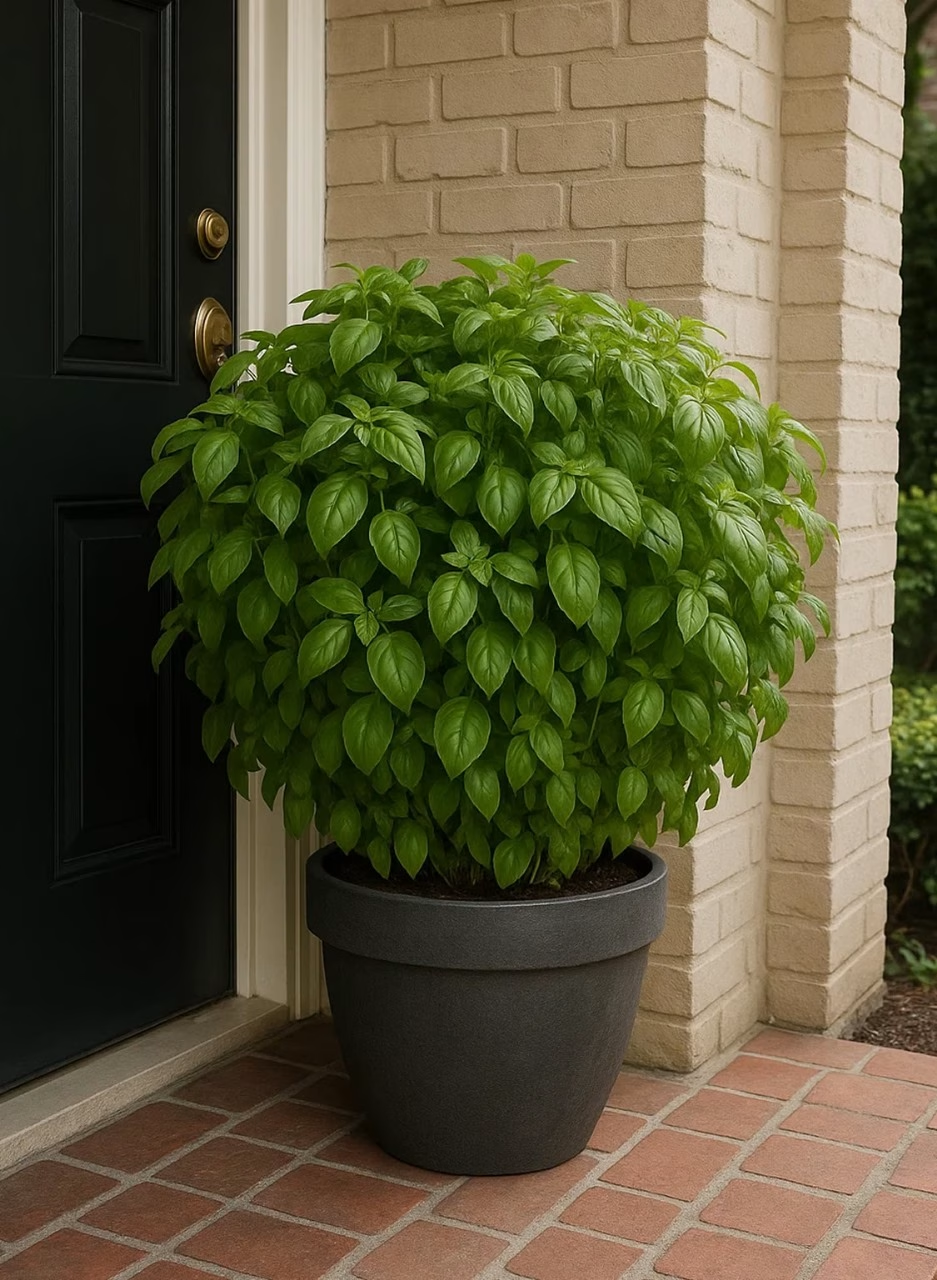
Beyond the Store-Bought: Cultivating Your Own Everlasting Basil Supply
While mastering the art of preserving store-bought basil is incredibly empowering, there’s an even deeper level of basil mastery: growing your own. Imagine a never-ending supply of fresh, aromatic basil just steps away, free from wilting woes and ready whenever you need it. Growing your own basil not only ensures unparalleled freshness and flavor but also significantly reduces your reliance on store-bought bunches, which often come with a limited shelf life and plastic packaging. It’s an incredibly rewarding experience that deepens your connection to your food and provides a sustainable, cost-effective source of this beloved herb.
For many, the idea of growing herbs feels daunting, but basil is surprisingly forgiving and thrives with a little basic care. From a sunny windowsill to a small garden patch, there are options for almost any living situation. This section will empower you to move beyond just preserving; it will show you how to *produce* your own continuous stream of fresh basil, turning your kitchen into a self-sufficient, basil-rich haven. The satisfaction of harvesting your own vibrant leaves is an experience unmatched by any store-bought alternative.
ADVERTISEMENT
Why Grow Your Own? The Freshness Advantage
The most compelling reason to grow your own basil is, without a doubt, the unparalleled freshness. There’s no travel time, no packaging, no days spent wilting on a shelf. You simply snip what you need, when you need it. This means maximum flavor, vibrant color, and the most potent aromatic compounds, which are at their peak right after harvesting. This level of freshness is impossible to achieve with store-bought basil, no matter how quickly you try to preserve it.
Beyond freshness, growing your own offers a consistent supply. Instead of relying on grocery store availability or dealing with wilting bunches, you have a continuous source, allowing for spontaneous culinary creations. It’s also incredibly cost-effective in the long run. A single packet of basil seeds or a small starter plant can provide an abundant harvest for months, far cheaper than repeatedly buying small bunches. Furthermore, you control the growing conditions, ensuring your basil is organic and free from unwanted pesticides. This is more than just a convenience; it’s a lifestyle choice towards healthier, more sustainable eating. It’s about having the power of fresh basil truly at your fingertips, making every meal a little brighter.
Basic Basil Growing Tips: From Seed to Harvest
Growing basil is surprisingly straightforward, even for novice gardeners. It’s a sun-loving plant, so choose a spot that receives at least 6-8 hours of direct sunlight per day. A south-facing windowsill, a patio, or a sunny spot in your garden are ideal. Basil thrives in well-draining soil, whether in pots or in the ground. Use a good quality potting mix if growing in containers. Watering is crucial: keep the soil consistently moist but never waterlogged. Stick your finger into the soil; if the top inch feels dry, it’s time to water. Avoid watering the leaves directly to prevent fungal issues.
Pinching is the secret to a bushy, prolific basil plant. Once your plant has grown about 6-8 inches tall and developed a few sets of true leaves, start pinching off the top two sets of leaves, just above a leaf node. This encourages the plant to branch out, producing more leaves rather than growing tall and leggy. Pinch off any flower buds as soon as they appear, as flowering signals the plant to stop producing leaves and focus on seed production, diminishing flavor. Pests are usually minor, but keep an eye out for aphids or whiteflies; a gentle spray of soapy water can often deter them. With these simple tips, you can enjoy a continuous harvest from spring through fall, filling your kitchen with fresh basil year-round, which you can then preserve using the methods we’ve discussed. But what if you want to extend a single plant indefinitely?
ADVERTISEMENT
Propagating Basil from Cuttings: An Endless Cycle
The ultimate act of basil self-sufficiency is propagating new plants from cuttings. This means you can turn one healthy basil plant into many, creating an endless cycle of fresh basil without ever needing to buy seeds or new plants again. It’s incredibly satisfying and surprisingly simple. Here’s how: Choose a healthy, non-flowering stem from an established basil plant. Cut a section about 4-6 inches long, just below a leaf node (the point where leaves emerge from the stem). Remove the bottom sets of leaves, ensuring at least two sets of leaves remain at the top.
Place the cut stem in a glass of clear water, ensuring no leaves are submerged in the water. Position the glass in a warm spot with indirect light. Within a week or two, you’ll notice small white roots beginning to emerge from the node where you removed the lower leaves. Change the water every few days to keep it fresh and prevent mold. Once the roots are about an inch long, typically after 2-3 weeks, your new basil plant is ready to be transplanted. Gently plant the rooted cutting into a small pot filled with good potting mix. Water it well, and within no time, you’ll have a thriving new basil plant, ready to provide a fresh supply. This propagation technique is a true game-changer, offering an endless, self-sustaining source of fresh basil for your kitchen. Imagine transforming your kitchen into a basil-preserving powerhouse, stocked with your own homegrown, perfectly preserved herb. Let’s explore the transformative power of this newfound basil abundance.
The Transformative Power of Long-Lasting Basil: Culinary Inspirations
You’ve mastered the art of basil preservation, whether through careful water immersion, strategic paper towel wraps, inventive oil infusions, or meticulous drying. But why go to all this effort? The answer lies in the profound impact a readily available supply of fresh, high-quality basil can have on your cooking and your kitchen culture. This isn’t just about reducing waste; it’s about unlocking a new level of culinary confidence, creativity, and enjoyment. Having long-lasting basil transforms it from a fleeting luxury into an everyday staple, inspiring you to experiment and elevate even the simplest dishes.
Imagine no longer hesitating to add a generous handful of basil to your pasta sauce because you’re worried about wasting the rest of the bunch. Picture spontaneous caprese salads, fragrant pestos on demand, or a garnish of vibrant green that truly makes a dish pop. The true value of long-lasting basil isn’t just in its extended shelf life, but in the freedom it gives you in the kitchen. It’s about making gourmet flavors accessible and effortless, turning everyday meals into something special, all while embracing a more sustainable approach to food.
ADVERTISEMENT
Elevating Everyday Meals: A Dash of Freshness
With a continuous supply of preserved basil, your everyday meals gain an instant upgrade. No longer is basil reserved for special occasions or when you happen to buy a fresh bunch. Think of the simple joy of adding finely chopped fresh basil to your morning scrambled eggs, transforming a mundane breakfast into a gourmet delight. A sprinkle over a classic Margherita pizza, post-oven, brings a vibrant freshness that elevates it beyond takeout quality. Even a humble grilled cheese sandwich can become extraordinary with a few fresh basil leaves tucked inside.
Consider simple pasta dishes: instead of relying solely on dried herbs, your preserved basil (whether fresh from the fridge or a thawed pesto cube) can lend a vibrant, authentic Italian flavor. Add it to homemade salad dressings, infuse olive oil for dipping bread, or stir it into a basic tomato soup just before serving. The sheer accessibility of quality basil means you’ll reach for it more often, experimenting with its peppery sweetness in unexpected ways. It’s a subtle but powerful shift that makes your home cooking more vibrant, flavorful, and satisfying, every single day. This isn’t just about making your food taste good; it’s about making your kitchen a place of constant inspiration.
Seasonal Feasting: Enjoying Basil Year-Round
One of the greatest benefits of long-term basil preservation is the ability to enjoy the taste of summer, year-round. Imagine the depths of winter, when fresh basil is expensive and often lackluster, and you can pull out a vibrant green pesto cube or a jar of oil-packed basil from your freezer. This allows you to create truly seasonal dishes regardless of the calendar month. Basil-infused dishes like Caprese salads or fresh pasta with vibrant green pesto can be enjoyed even when snow is on the ground.
Use your frozen pesto cubes to enrich winter stews or add a summery note to roasted root vegetables. Dried basil is perfect for hearty, slow-cooked meals like minestrone, beef bourguignon, or chicken cacciatore, where its mellow, concentrated flavor can slowly infuse the dish. You can even make basil-infused butter from blanched leaves, freezing it in logs for savory spreads or to finish off pan sauces. This ability to capture and release the essence of summer basil, months later, is a culinary superpower. It ensures that the bright, aromatic notes of basil are never out of reach, making every meal a celebration of year-round freshness and flavor, defying seasonal limitations.
ADVERTISEMENT
Waste Not, Want Not: The Sustainable Kitchen
Beyond the culinary benefits, mastering basil preservation embodies a crucial principle of modern living: “waste not, want not.” How many times have you thrown away half-used, wilted basil bunches? This contributes to significant household food waste, which has environmental and economic consequences. By extending the life of your basil, you dramatically reduce your personal food waste footprint. Every leaf saved from the bin is a small victory for sustainability.
Economically, it’s a smart move. Buying basil, using what you need, and effectively preserving the rest means you get more value for your money. You won’t need to constantly repurchase, saving trips to the grocery store and reducing impulse buys. This conscious approach to food resource management fosters a more mindful and efficient kitchen. It’s about building good habits, being resourceful, and appreciating the full potential of every ingredient you bring into your home. This isn’t just about saving basil; it’s about embracing a lifestyle that values sustainability, efficiency, and deliciousness in equal measure. You’re not just a cook; you’re a conscious consumer, making a positive impact with every perfectly preserved basil leaf.
Your Basil Mastery Journey: The Path to Culinary Confidence
You embarked on this journey with a common kitchen frustration: the fleeting life of fresh basil. Now, you’re equipped with the knowledge, techniques, and insider tips to transform that frustration into culinary confidence. From understanding basil’s delicate nature to mastering a range of preservation methods – from short-term hydration to long-term freezing and drying – you are no longer at the mercy of wilting leaves. You have the power to keep basil vibrant and flavorful for days, weeks, and even months, making it a reliable, accessible ingredient in your kitchen repertoire.
This isn’t merely about preserving a herb; it’s about embracing a more sustainable, flavorful, and efficient way of cooking. It’s about reducing food waste, saving money, and always having that burst of fresh flavor on hand to elevate your dishes. Imagine the joy of reaching for your freezer and pulling out a perfectly preserved pesto cube in the middle of winter, or effortlessly sprinkling homemade dried basil into a simmering sauce. This newfound mastery will inspire you to cook more, experiment more, and appreciate the simple magic of fresh ingredients.
ADVERTISEMENT
The true magic, however, isn’t just in knowing these techniques; it’s in putting them into practice. So, the next time you bring home a fresh bunch of basil, choose your method, dedicate a few moments to its preservation, and watch as your culinary confidence blossoms. What’s the first basil dish you’re going to create with your perfectly preserved stash? Share your thoughts and let’s keep this conversation, and our basil, ever fresh!
