The Unseen Enemy: How to Banish Bacteria and Stains from Your White Plastic Cutting Boards Forever
Imagine your kitchen: a vibrant hub of culinary creativity, where delicious meals come to life. In this idyllic scene, there’s one unsung hero often overlooked, silently bearing the brunt of every chop, slice, and dice: your white plastic cutting board. It starts off pristine, a beacon of hygiene, but as time wears on, it transforms into a canvas of stubborn stains and, more alarmingly, a potential breeding ground for unseen dangers. You scrub, you rinse, but still, that faint pink hue from the beetroot, the yellow smear from the turmeric, or those insidious dark lines persist. This isn’t just about aesthetics; it’s about safeguarding your family’s health. Are you ready to unlock the secrets to not just clean, but truly sanitize and restore your boards to their original glory?
This isn’t just another cleaning guide; it’s a deep dive into the psychology of kitchen hygiene, a journey to empower you with knowledge that goes far beyond surface-level solutions. We’re talking about battling invisible adversaries, reclaiming your kitchen’s purity, and ensuring every meal you prepare is as safe as it is delicious. From understanding the unique challenges white plastic presents to mastering advanced cleaning techniques that even professional chefs swear by, this article promises to transform your approach to kitchen cleanliness. But here’s where it gets interesting: the fight against contamination isn’t always obvious, and many common cleaning habits might actually be doing more harm than good.
The Silent Threat Lurking in Your Kitchen – Why White Plastic Boards Are Different
Our kitchens are often seen as fortresses of nourishment, but beneath the surface of seemingly clean utensils, a silent war wages. Your white plastic cutting board, a common fixture in millions of homes across the UK and USA, is at the heart of this unseen conflict. Its bright, clean appearance is deceptive, lulling us into a false sense of security. Unlike wood, which possesses natural antimicrobial properties, plastic is inert. And unlike glass, which is non-porous, plastic cutting boards have a microscopic topography that is far more complex than meets the eye.
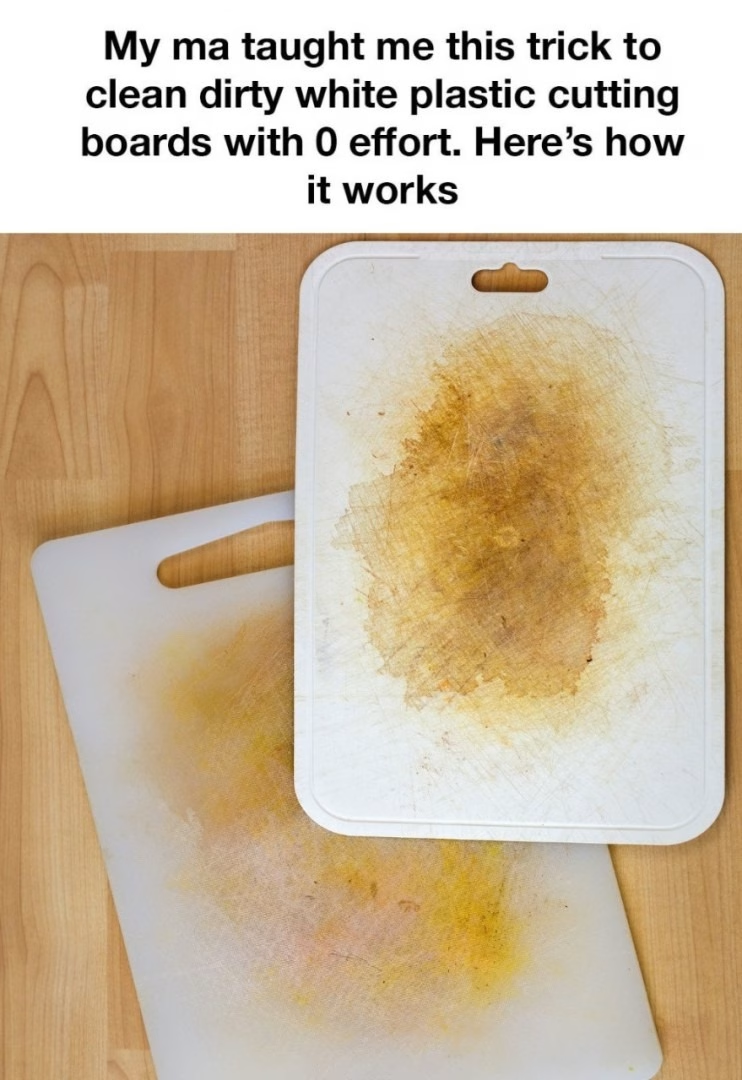
The choice of white plastic isn’t accidental; it’s designed to visually highlight dirt and stains, prompting quicker action. However, this very feature also reveals its vulnerability. The vibrant colours of your food, the dark juices from meats, and the potent spices all leave their mark, seeping into the tiny grooves and scratches that inevitably develop over time. But those visible marks are merely the tip of the iceberg, a visual cue to a much deeper, more concerning issue that lurks beneath.
ADVERTISEMENT
The Allure and The Pitfall: Why We Choose White Plastic
White plastic cutting boards are kitchen staples for a reason. They are lightweight, generally affordable, and can be tossed into the dishwasher without much fuss – or so we believe. Their pristine white surface screams ‘clean’ and allows for clear visibility of food items being prepped, reducing the risk of accidental cuts. For busy families and amateur chefs alike, they offer a convenient, practical solution for everyday cooking tasks, seemingly marrying functionality with perceived hygiene. Yet, this very convenience often masks a fundamental flaw in their design when it comes to long-term cleanliness and sanitation.
The uniform, non-slip surface, initially smooth, begins to tell a story of countless meals. Each knife stroke, no matter how careful, creates tiny incisions, micro-grooves that expand and deepen with every use. These invisible valleys become perfect harbours for food particles, moisture, and, most critically, microscopic organisms. What starts as a simple, easy-to-clean tool slowly transforms into a complex ecosystem, far more challenging to truly purify than we might imagine. This subtle degradation is the pitfall, the hidden cost of convenience.
More Than Just a Stain: The Hidden Dangers of Neglected Boards
It’s tempting to view a stained cutting board as a mere cosmetic issue. “It’s just a bit discoloured,” we tell ourselves, “it’s clean enough.” But this complacent attitude can have serious health repercussions. Those colourful marks aren’t just pigments; they often indicate the presence of deeply embedded organic matter, which provides a rich nutrient source for bacteria. Even after a thorough scrub with soap and water, harmful pathogens like Salmonella, E. coli, and Campylobacter can linger in the microscopic crevices, patiently waiting for their next victim.
The danger is compounded by the phenomenon of cross-contamination. Imagine slicing raw chicken on a board, then, after a quick rinse, dicing vegetables for a salad. If the board wasn’t properly sanitized, bacteria from the poultry can transfer directly to your fresh produce, creating a pathway for foodborne illness. This isn’t a rare occurrence; it’s a silent threat in countless kitchens. The vibrant colours of your dinner can become the subtle signals of a hidden hazard, prompting an urgent need to rethink your cleaning regimen.
ADVERTISEMENT
The Micro-Battleground: Understanding Porosity and Bacterial Havens
To truly conquer the cleaning challenge, we must understand the battlefield itself: the surface of your white plastic cutting board. While plastic is often considered non-porous, the reality at a microscopic level is far more nuanced. As knives score the surface, they create an intricate network of nooks and crannies. These tiny imperfections, invisible to the naked eye, act as miniature caves, offering shelter and sanctuary to bacteria and mould spores.
Water, detergents, and even mild disinfectants struggle to penetrate these microscopic havens effectively. Bacteria, resilient and adaptable, can form biofilms within these grooves – a protective layer that makes them even harder to dislodge. This isn’t just about a superficial layer of dirt; it’s about deeply entrenched colonies that can proliferate rapidly, especially in warm, moist environments. Understanding this micro-battleground is the first step towards formulating a winning strategy, preparing you for the advanced techniques that are about to be revealed. It’s not just about what you see; it’s about what you *don’t* see that could be truly terrifying.
Beyond the Surface – The Science of Stubborn Stains and Lingering Odors
You’ve probably encountered them: the ghost of a curry past, clinging stubbornly to your board, or the persistent pink blush of a tomato that just won’t fade. These aren’t random occurrences; they are the result of specific chemical interactions between your food and the plastic surface. To truly banish these unwelcome guests, we need to understand their nature. It’s a fascinating journey into the science of why certain colours and smells embed themselves so deeply, turning your once-pristine board into a visual diary of culinary adventures.
But the science isn’t just academic; it informs every cleaning decision you make. Knowing *why* a stain is there empowers you to choose the *right* agent to combat it, avoiding fruitless scrubbing or, worse, damaging your board. This section will peel back the layers, revealing the chemistry behind those stubborn marks and the microbiology behind those lingering smells. Prepare to unlock a deeper understanding of your kitchen tools, moving from mere cleaning to a level of informed mastery. What you’re about to learn will fundamentally change how you view your kitchen chores.
The Chemistry of Discoloration: Why Turmeric and Tomato Are Your Board’s Worst Nightmare
Think about the vibrant hues of turmeric, tomato paste, or beetroot. These colours come from powerful natural pigments, specifically designed by nature to be intense and enduring. Turmeric, for instance, contains curcumin, a compound notoriously adept at staining almost anything it touches due to its molecular structure and its affinity for plastics. Tomatoes owe their redness to lycopene, another potent pigment that readily adheres to surfaces.
ADVERTISEMENT
When these pigments come into contact with the micro-scratches and pores of your plastic board, they don’t just sit on the surface; they penetrate. The plastic, being porous at a microscopic level, absorbs these compounds. Heat from cooking or even from washing with hot water can further ‘set’ these stains, driving the pigments deeper into the material. This chemical bonding makes them incredibly resistant to simple soap-and-water washes. It’s a battle of molecular adhesion, and your standard dish soap is often outmatched. But don’t despair; understanding this chemical bond is the first step toward breaking it.
The Odor Enigma: Unraveling Why Boards Retain Smells (and How to Fight Back)
Beyond the visual assault of stains, there’s the olfactory challenge: those lingering smells of onion, garlic, fish, or strong cheeses. These odours are caused by volatile organic compounds (VOCs) – tiny molecules that evaporate into the air and, crucially, can also be absorbed by porous surfaces like your cutting board. Just as pigments embed themselves, these odoriferous molecules can get trapped within the plastic’s microscopic network.
Standard washing often removes the bulk of the food residue but leaves behind these trapped VOCs. As the board dries, these molecules are slowly released, leading to that tell-tale lingering smell that contaminates everything it touches, including your next batch of food. Moreover, some odours can be indicative of bacterial activity; certain bacteria produce foul-smelling byproducts as they break down food residue. Tackling odours isn’t just about freshness; it’s another layer of the hygiene puzzle. Now that we understand the enemy, are you ready to discover the arsenal you need to win this war?
The Unsung Heroes: Understanding pH and Abrasives in Cleaning
When it comes to serious cleaning, two scientific principles become your best friends: pH and abrasion. pH refers to the acidity or alkalinity of a substance, measured on a scale from 0 (highly acidic) to 14 (highly alkaline), with 7 being neutral. Acids, like those found in vinegar or lemon juice, are excellent at breaking down mineral deposits, some organic stains, and even disrupting bacterial cell walls. Alkaline substances, like baking soda or bleach, are powerful degreasers and stain lifters, adept at dissolving fats and proteins, and acting as formidable disinfectants.
ADVERTISEMENT
Abrasives, on the other hand, provide the mechanical action needed to physically scrub away embedded particles. Fine abrasives, like those in baking soda, work by gently scouring the surface, reaching into those microscopic grooves without causing significant damage. The key is to use the right pH and the right abrasive for the specific problem, combining chemical action with physical force. This nuanced approach separates mere rinsing from true, deep cleaning, unlocking capabilities you never knew you had. With this foundational knowledge, you’re better equipped to approach your cleaning arsenal strategically.
The Daily Defense – Quick Wins for Immediate Freshness (But Don’t Be Fooled!)
In the fast-paced world of meal prep, it’s easy to fall into the routine of a quick rinse and a dash of dish soap. This daily defense is certainly better than nothing, providing immediate freshness and removing obvious food residue. It gives the illusion of cleanliness, making your board look presentable for its next culinary assignment. However, this seemingly efficient routine often masks a deeper truth: surface-level cleaning is not sanitation. It’s a critical distinction that many home cooks overlook, potentially jeopardizing their kitchen’s hygiene.
While these quick wins are essential for preventing immediate build-up and keeping your kitchen tidy, they are merely the first line of defense. They are the tactical skirmishes, not the full-scale war. Understanding their limitations is key to evolving your cleaning strategy, moving beyond the superficial to achieve true, lasting cleanliness. This section will reveal why your usual habits, while well-intentioned, might be leaving you vulnerable to invisible threats. Prepare to challenge your assumptions about what ‘clean’ truly means.
The Post-Meal Ritual: Simple Steps for Surface Cleanliness
Immediately after use, rinse your white plastic cutting board under hot running water. Use a stiff-bristled brush or a scrubbing sponge with a good quality dish soap. Focus on physically scrubbing away all visible food particles, paying particular attention to any areas where meat or poultry were cut. This immediate action prevents food from drying onto the surface and embedding deeper into the plastic, making future deep cleaning far easier. It’s about being proactive, not reactive, tackling mess before it has a chance to set in. Think of it as a preemptive strike against stubborn stains and bacterial growth, setting the stage for future interventions.
ADVERTISEMENT
Once you’ve scrubbed thoroughly, rinse the board again until all soap suds are gone. It’s crucial that no soapy residue remains, as this can attract new dirt or even leave a film that harbours bacteria. Air dry the board completely by standing it upright in a dish rack or leaning it against a wall to allow maximum airflow. Allowing your board to air dry completely is a simple yet powerful step, preventing moisture, which is a key ingredient for bacterial proliferation. This quick post-meal ritual is your frontline defense, a non-negotiable step in maintaining basic kitchen hygiene, but remember: basic is not always enough.
Dishwasher Debacle: The Truth About Machine Washing Your Boards
Many white plastic cutting boards are marketed as “dishwasher safe,” a convenience that often leads to a false sense of security. While running your board through a dishwasher does expose it to hot water and detergent, the effectiveness can be debatable. The high heat can warp certain types of plastic over time, creating new grooves and crevices that are even harder to clean. Furthermore, dishwashers primarily rely on water jets and detergent to clean; they don’t always provide the targeted scrubbing needed for deeply embedded stains or bacteria in those microscopic knife marks.
Moreover, if your dishwasher isn’t reaching sufficiently high temperatures or if the board is improperly loaded, some areas might not get adequately cleaned or sanitized. While the general heat helps, it often isn’t enough to achieve true disinfection, especially against robust bacterial biofilms. For daily maintenance, a dishwasher can be a time-saver, but it should not be considered a substitute for occasional targeted deep cleaning and sanitization. Relying solely on the dishwasher might be convenient, but it might also be compromising your kitchen’s true cleanliness. The quick rinse fallacy is another common trap to avoid.
The Quick Rinse Fallacy: Why It’s Never Enough
A common misconception, particularly when dealing with non-meat items, is that a quick rinse under the tap is sufficient. You’ve chopped some vegetables, perhaps a few herbs, and the board looks clean. A quick splash of water, maybe a swipe with a cloth, and it’s back in the drawer. This “quick rinse fallacy” is perhaps the most insidious habit in kitchen hygiene. While surface dirt might be washed away, invisible food particles, sugars, and starches remain, clinging to the microscopic textures of the plastic.
ADVERTISEMENT
These residual elements are prime food sources for bacteria, which thrive in moist environments. A quick rinse leaves behind enough moisture and nutrients for these microorganisms to multiply rapidly, especially if the board isn’t immediately and thoroughly dried. The board might look clean, but it’s a silent breeding ground. This complacency can lead to a gradual build-up of bacteria and the setting of persistent stains over time. While these daily habits are good, they merely scratch the surface. True cleanliness demands a deeper dive…
Deep Dive Disinfection – Unleashing the Power of Common Household Heroes
So, you’ve mastered the daily ritual, understood the limitations of the quick rinse, and are ready for the next level. This is where your cleaning journey truly begins to transform. Beyond everyday soap and water, your kitchen cupboards hold an arsenal of powerful, yet often misunderstood, allies: bleach, vinegar, baking soda, and hydrogen peroxide. These are the household heroes, capable of tackling the toughest stains, eradicating deep-seated bacteria, and neutralizing persistent odours that your daily wash simply can’t touch.
But like any powerful tool, they must be used correctly. Misapplication can be ineffective or even damaging. This section will guide you through the precise application of each of these agents, demystifying their chemical power and providing step-by-step instructions that ensure maximum efficacy without compromising safety. Prepare to witness astonishing transformations as your white plastic boards reclaim their original, gleaming purity. The secrets to sparkling surfaces are not complex; they are simply precise. Are you ready to wield these potent weapons?
The Bleach Revelation: Dispelling Myths and Mastering the Method (Step-by-Step)
Bleach (sodium hypochlorite) is perhaps the most powerful disinfectant and stain remover in your cleaning arsenal, but it’s also the most feared and misunderstood. Forget the myths about damaging plastic or being excessively toxic; when used correctly, bleach is remarkably effective and safe for white plastic cutting boards. Its power lies in its ability to break down organic matter and kill a vast spectrum of bacteria and viruses by denaturing their proteins.
ADVERTISEMENT
-
Preparation is Key: First, ensure your board is free of all visible food particles. Scrub it with hot soapy water and rinse thoroughly. This step is crucial because bleach is deactivated by organic matter, making it less effective if dirt is still present.
-
Dilution is Diligence: Never use bleach undiluted. The standard recommendation for sanitizing food contact surfaces is a solution of 1 teaspoon of liquid chlorine bleach per gallon (approx. 3.8 litres) of water. For smaller amounts, 1/4 teaspoon per litre (approx. 4 cups) works perfectly. Always add bleach to water, not water to bleach, to minimize splashing.
-
The Soaking Solution: Submerge your white plastic cutting board completely in the bleach solution. Ensure no part of the board is floating or exposed. For heavily stained or deeply scored boards, you can gently weigh it down with a clean, non-porous object.
-
The Power of Time: Allow the board to soak for a minimum of 2-5 minutes. For stubborn stains or known high-contamination incidents (e.g., raw poultry), you can extend this to 10-15 minutes. You’ll often see stains visibly fading during this period, which is incredibly satisfying.
-
Rinse, Rinse, Rinse: After soaking, remove the board and rinse it thoroughly under hot running water for several minutes. The goal is to remove all traces of the bleach solution. You can even wipe it down with a clean cloth under running water for extra assurance. Don’t worry, the bleach quickly breaks down and dissipates.
-
Final Air Dry: Allow the board to air dry completely by standing it upright. This final step is vital for preventing any lingering moisture which could encourage new bacterial growth. Using bleach is a powerful transformation, but what if these weren’t enough? What if your board has seen battles that require a more strategic approach?
Vinegar’s Secret Strength: Acetic Acid’s Astonishing Ability (Tips and Tricks)
White distilled vinegar, primarily composed of acetic acid, is a natural powerhouse for cleaning and mild disinfection. While not as potent as bleach for killing all pathogens, it excels at breaking down grease, removing mineral deposits, and neutralizing odours. Its acidic nature makes it particularly effective against mould and mildew, and it can also help to lift certain food stains by disrupting their chemical bonds with the plastic.
For a daily deodorizing and mild sanitizing treatment, spray undiluted white vinegar directly onto your clean board after each use. Let it sit for 5-10 minutes, then rinse thoroughly and air dry. For a deeper clean or to tackle persistent odours, create a paste with baking soda (which we’ll cover next) and vinegar. The fizzing reaction between the two creates a gentle abrasive action and a potent cleaning solution. This method is particularly useful for boards where you prefer to avoid bleach due to sensitive skin or a strong preference for natural solutions. Vinegar is a silent, yet formidable, ally in your cleaning quest, perfect for regular maintenance and odour elimination, but its true magic is often unlocked in combination.
Baking Soda’s Brilliance: The Gentle Giant of Grime Removal (Practical Applications)
Sodium bicarbonate, commonly known as baking soda, is a truly versatile cleaning agent. Its mild abrasive quality allows it to gently scrub away embedded stains and grime without scratching the plastic surface. Furthermore, baking soda is an excellent deodorizer, absorbing and neutralizing those stubborn food odours that cling to your board. It works wonders on organic stains like those from tomatoes, berries, or coffee, physically lifting the pigments from the plastic pores.
To use baking soda for stains, make a thick paste by mixing it with a small amount of water. Apply the paste generously to the stained areas of your board, ensuring it covers the marks completely. Let the paste sit for 15-30 minutes, or even longer for very deep stains – some recommend leaving it overnight. Then, use a stiff-bristled brush or a non-abrasive scrubbing pad to scrub the paste into the board, paying extra attention to knife marks. The baking soda will gently scour the surface, pulling out the embedded discolouration. Rinse thoroughly and dry. For general deodorizing, simply sprinkle baking soda generously over the entire board, let it sit for an hour or two, then brush off and rinse. Baking soda offers a gentle, yet powerful, solution, especially when combined with other agents.
ADVERTISEMENT
The Peroxide Paradox: A Lesser-Known Weapon in Your Cleaning Arsenal
Hydrogen peroxide, typically found in a 3% solution, is another unsung hero in the battle against cutting board stains and bacteria. It’s an oxidizing agent, meaning it works by releasing oxygen, which helps break down organic matter, bleach stains, and kill microorganisms. It’s a fantastic alternative for those who are sensitive to bleach or prefer a less harsh chemical. Peroxide also has the benefit of breaking down into water and oxygen, leaving no harmful residues, which makes it an incredibly eco-friendly option once it has done its job.
To use hydrogen peroxide, first clean your board with soap and water to remove any loose debris. Then, generously spray or pour 3% hydrogen peroxide over the entire surface of the board, especially covering any stained or deeply scored areas. Allow it to sit and bubble for 10-15 minutes. You might see a slight fizzing action, which indicates the peroxide is working. After the desired time, rinse the board thoroughly under running water and air dry completely. Hydrogen peroxide is particularly effective against mould and mildew stains and can give your white board that extra bright boost. But what if these powerful single agents aren’t enough? What if your board has seen battles that require a more strategic, combined approach?
Tackling the Toughest Foes – Eradicating Embedded Stains and Deep-Set Germs
Sometimes, the enemy is entrenched. Those deeply embedded stains that mock your every cleaning effort, the microscopic grooves that seem to hold onto pathogens with an almost defiant grip. These are the toughest foes, requiring a combination of ingenuity, time, and the synergistic power of multiple cleaning agents. This section dives into advanced techniques, leveraging the combined strengths of natural elements and clever application methods to achieve truly pristine results. Prepare to discover the “secret weapons” that will elevate your cleaning game from good to absolutely legendary.
This isn’t just about scrubbing harder; it’s about scrubbing smarter. We’ll explore age-old wisdom, surprising hacks, and strategic considerations that address the very structure of your cutting board, ensuring that no stain or germ is left behind. You’ve learned the individual powers; now, it’s time to unlock their collective might. Are you ready to see your white plastic cutting board reborn, gleaming and hygienically sound, as if it were brand new? The journey to restoration begins now, but it requires patience and precision.
ADVERTISEMENT
The Lemon and Salt Sorcery: An Old-School Hack for Modern Stains
This classic remedy combines the abrasive power of salt with the natural bleaching and acidic properties of lemon juice. It’s surprisingly effective for many common food stains, particularly those from fruits, vegetables, and even some light meat residues. The magic lies in the gentle scouring action of the salt combined with the stain-lifting capabilities of the citric acid in the lemon. This method is also completely natural, making it a favourite for those seeking chemical-free solutions for their kitchen.
To perform this “sorcery,” generously sprinkle coarse salt (kosher salt or sea salt works best) over the entire surface of your white plastic cutting board, especially on the stained areas. Then, take half a lemon and use it as a scrubbing tool, squeezing it gently as you rub it over the salt and across the board. The lemon juice will mix with the salt, forming a paste, and the rough texture of the lemon peel will aid in the scrubbing. Work the paste into all the grooves and knife marks. Let the mixture sit on the board for 15-30 minutes, allowing the lemon’s acid to work its magic. Finally, rinse the board thoroughly with hot water and dry it completely. You’ll be amazed at how many stains simply vanish, leaving behind a fresh, subtly citrusy scent. This technique proves that sometimes, the simplest solutions are the most profound.
Sun Power: Harnessing UV Rays for Natural Disinfection
Nature itself provides a powerful, free disinfectant: sunlight. Ultraviolet (UV) rays, particularly UV-C, have germicidal properties, meaning they can kill bacteria and viruses by damaging their DNA. While direct sunlight doesn’t provide concentrated UV-C like a specialized germicidal lamp, prolonged exposure to direct sunlight can still contribute to the sanitization of your white plastic cutting board, especially after it has been thoroughly cleaned with other methods.
After washing and drying your board, place it in a spot where it will receive direct, unfiltered sunlight for several hours. This method is particularly effective for reducing lingering odours and providing an extra layer of antimicrobial protection. However, a word of caution: extremely prolonged exposure to intense sunlight over many years can potentially lead to some degradation of certain plastics, but for occasional sanitization, it’s a safe and effective trick. This old-world wisdom offers a surprising boost to your modern cleaning efforts, harnessing the power of the cosmos to keep your kitchen spotless. But for those truly stubborn particles, you might need a bit more elbow grease and the right tools.
ADVERTISEMENT
The Art of Scrubbing: Choosing the Right Tools Without Damaging Your Board
Scrubbing is an art, not just a chore. The effectiveness of your cleaning agents often hinges on the mechanical action of scrubbing, but using the wrong tool can do more harm than good. Abrasive scrubbers like steel wool or very coarse sponges can create deeper scratches on your plastic board, effectively making more microscopic havens for bacteria and stains to hide in the future. The goal is to clean without further damaging the board’s surface integrity.
For optimal results, opt for a stiff-bristled nylon brush or a non-scratch scrubbing pad. These tools provide sufficient friction to dislodge embedded particles and work cleaning pastes into the grooves without leaving behind significant damage. For particularly stubborn grime in deep knife marks, a dedicated cutting board brush with extra stiff bristles can be invaluable. The key is consistent, firm pressure, working in small circular motions. Remember, the goal is to lift and remove, not to gouge. Selecting the right scrubbing tool is as crucial as choosing the right cleaning solution; it ensures that your efforts are truly productive, not counterproductive. Beyond the surface: the importance of understanding micro-scratches is critical to preventing future issues.
Beyond the Surface: The Importance of Micro-Scratches
We’ve touched on this before, but it bears repeating: those tiny, almost invisible knife marks on your plastic cutting board are not just cosmetic imperfections; they are critical weak points in your kitchen’s hygiene defence. These micro-scratches are the primary reason why plastic boards can become problematic over time. They are too small for a sponge to effectively clean and too deep for a simple rinse to flush out thoroughly. They become microscopic trenches where food particles, moisture, and, most ominously, bacteria can settle and multiply unseen.
Understanding the pervasive nature of these micro-scratches emphasizes the need for regular, deep cleaning and sanitization. It explains why a daily wash isn’t enough and why agents like bleach, hydrogen peroxide, or baking soda paste are necessary to penetrate these hidden havens. Your board’s surface might appear smooth from a distance, but under a magnifying glass, it reveals a complex topography. Recognising this underlying structure is paramount to developing a truly effective long-term cleaning strategy. We’ve covered the what and the how, but preventing future problems is key. The secrets to lasting hygiene are just around the corner…
ADVERTISEMENT
Proactive Protection – Extending the Life and Luster of Your White Boards
Cleaning your cutting boards after use is crucial, but true kitchen mastery lies in prevention. Just like any valuable tool, your white plastic cutting boards will last longer and perform better if you implement proactive measures to protect them. This isn’t just about extending their lifespan; it’s about maintaining their hygienic integrity from the outset, reducing the opportunities for stains to set and bacteria to flourish. Think of it as investing in the future cleanliness of your kitchen, saving yourself effort and worry down the line.
From strategic use to smart storage, these proactive tips will help you create a system that minimizes damage and maximizes hygiene. You’ll discover how simple changes in habit can yield astonishing long-term benefits, keeping your boards looking newer and functioning safer for longer. This section is about working smarter, not harder, transforming your routine from reactive cleaning to proactive preservation. Are you ready to unlock the secrets to maintaining that “brand new” look and feel for years to come?
The Board Rotation Strategy: Why You Need More Than One
One of the simplest yet most effective proactive strategies is the “board rotation” method. Instead of relying on a single cutting board for all your culinary tasks, invest in at least two, or ideally, three. Designate one board solely for raw meats (poultry, beef, pork), another for raw vegetables and fruits, and a third for cooked foods, bread, or ready-to-eat items. Often, colour-coded boards (red for meat, green for veggies, yellow for poultry, white for dairy/bread) are used in professional kitchens for this very reason, but with white boards, clear verbal designation and immediate washing are key.
This strategy dramatically reduces the risk of cross-contamination, which is one of the most common causes of foodborne illness in home kitchens. It also means that individual boards endure less overall wear and tear, as their use is specialized. Less overall stress translates to fewer deep knife marks and a slower degradation of the surface, keeping them pristine for longer. This small investment in additional boards is a giant leap for your kitchen’s safety and the longevity of your tools, saving you time and worry in the long run. It’s a professional secret, now yours to deploy.
ADVERTISEMENT
The Drying Dilemma: Preventing Moisture-Related Issues
We’ve briefly touched upon this, but the importance of proper drying cannot be overstated. Moisture is the lifeblood of bacteria and mould. Even after a thorough cleaning and sanitization, if your white plastic cutting board isn’t allowed to dry completely, you’re essentially creating a five-star resort for microbial growth. This is particularly true for plastic, which doesn’t absorb moisture like wood and can therefore hold surface moisture for extended periods. This continuous dampness also contributes to the setting of stains and the proliferation of odours.
Always dry your board immediately after washing. The best method is to stand it upright in a dish rack, allowing air to circulate freely around all surfaces. Avoid stacking wet boards or laying them flat on counters, as this traps moisture underneath. If you’re in a hurry, a clean kitchen towel can be used to thoroughly wipe the board dry, followed by a few minutes of air drying to ensure every crevice is moisture-free. This simple habit is a cornerstone of preventing bacterial re-growth and maintaining the pristine condition of your board, protecting your efforts from being undone by a simple oversight.
Storage Savvy: Protecting Your Boards from Re-Contamination
Once your white plastic cutting board is sparkling clean and bone dry, its journey isn’t over. How you store it plays a significant role in preventing re-contamination and preserving its cleanliness. Tossing it back into a drawer with other damp utensils or leaning it against a wall where it can pick up grime from surfaces can undo all your hard work. Proper storage is the final seal of cleanliness, safeguarding your efforts until the next use.
Ideally, store your boards in a dedicated, clean, dry space. Vertical storage in a cutting board rack or a narrow cabinet slot allows for continued air circulation and prevents direct contact with other items that might transfer bacteria or moisture. If stacking is unavoidable, ensure each board is completely dry, and consider placing a clean paper towel between them for added moisture absorption. Protecting your clean board from its environment ensures that your efforts in cleaning are not wasted, making every meal prep a fresh and healthy start. This foresight ensures lasting hygiene. Even with the best care, sometimes a board reaches its limit. How do you know when it’s time to say goodbye, and embrace a new beginning?
ADVERTISEMENT
The Resurfacing Revelation: When to Consider a ‘Board Makeover’
For some plastic cutting boards, particularly thicker, higher-quality ones, there’s a secret technique that can extend their life dramatically: resurfacing. Over time, knife marks accumulate, becoming deep grooves that are incredibly difficult to clean and sanitize. These aren’t just aesthetic flaws; they are significant hygiene risks. A resurfacing technique involves lightly sanding down the top layer of the plastic to remove these deeply scored areas, effectively creating a “new” clean surface. This isn’t for every board, but it’s a surprising option for durable, heavy-duty models.
This process typically involves using fine-grit sandpaper (e.g., 220-grit or higher) in a circular motion, followed by progressively finer grits to smooth the surface. It requires careful hand-sanding or a very light touch with an orbital sander to avoid excessive heat buildup. While this might sound extreme, it’s a practice employed by some professional chefs and culinary schools to rejuvenate their most used boards. It’s an advanced tip that extends the investment in quality boards and postpones the need for replacement. However, it’s a specialized task and typically only applicable to thicker boards. For most home users, knowing when to simply replace your board is a more practical and equally important skill to master.
Decoding the Danger – When to Replace Your Cutting Board (The Telltale Signs)
Even with the most diligent cleaning, sanitization, and proactive care, there comes a point in every white plastic cutting board’s life when it’s time to say goodbye. Recognizing these “telltale signs” is not just about keeping your kitchen looking nice; it’s a critical aspect of food safety. A worn-out board isn’t just inefficient; it’s a liability, potentially harbouring bacteria that no amount of scrubbing can truly eradicate. Ignoring these signals can put your health, and the health of those you cook for, at risk. This section is a crucial guide to knowing when to let go and invest in a new, hygienic start for your kitchen.
It’s an uncomfortable truth: some boards are beyond redemption. This isn’t a failure on your part, but an acknowledgment of wear and tear, and the limits of even the most powerful cleaning agents. We’ll identify the clear indicators that scream “replace me!” so you can make informed decisions that prioritize safety above all else. This isn’t about being wasteful; it’s about being responsible. Prepare to learn the critical red flags that demand immediate action, ensuring your kitchen remains a sanctuary, not a source of unseen danger.
ADVERTISEMENT
The Groovy Graveyard: Understanding Deep Cuts and Their Bacterial Implications
The most obvious, and most dangerous, sign that your white plastic cutting board needs replacing is the presence of deep, numerous knife grooves. What starts as tiny scratches eventually becomes a complex network of deep cuts and gashes, creating what can only be described as a “groovy graveyard.” These deep crevices are virtually impossible to clean effectively. Dishcloths and sponges glide over them, and even the most potent cleaning agents struggle to penetrate and dislodge the organic matter and bacterial biofilms that embed themselves within these deep channels.
Imagine these grooves as miniature valleys where food particles and moisture become trapped. Bacteria, once lodged in these protected environments, are incredibly difficult to remove, even with bleach. They multiply, protected from your cleaning efforts, and pose a constant threat of cross-contamination to any food that touches the board. If you can easily catch your fingernail in a groove, it’s a critical sign. These deep cuts are not just cosmetic; they are literal health hazards. This isn’t a suggestion; it’s a directive: replace that board immediately.
Discoloration Beyond Repair: When Stains Become Permanent Health Hazards
While we’ve discussed tackling stubborn stains, there comes a point when discoloration becomes permanent and irreparable, signaling the end of your board’s useful life. If, after multiple attempts with powerful cleaning agents like bleach, baking soda paste, or hydrogen peroxide, your white plastic board remains significantly stained with deep, intractable colours (especially dark or mottled areas), it’s often a sign that organic matter has become deeply impregnated into the plastic structure. This isn’t just about aesthetics anymore; it’s about hygiene.
These permanent stains often indicate that the plastic’s porous nature has been compromised to a degree that it can no longer be effectively cleaned or sanitized. The pigments are deeply fused with the plastic, and where pigments can lodge, so can bacteria and their byproducts. If your board has changed colour to a point where it looks perpetually dirty, even after the most aggressive cleaning, it’s a strong indicator that it’s time for a replacement. This irreversible discolouration is a visual warning that the board’s integrity is compromised, and it’s time for a fresh start.
ADVERTISEMENT
The Warped Wisdom: Why a Deformed Board is a Dangerous Board
Plastic cutting boards, especially if repeatedly exposed to high heat (e.g., in dishwashers or left near hot stovetops), can warp and deform over time. A warped board isn’t just annoying; it’s a significant safety hazard in the kitchen. A board that doesn’t lie flat on your counter will wobble, making it unstable for chopping and slicing. This instability dramatically increases the risk of knife slips and serious injuries. A wobbly board can also lead to uneven cutting, impacting your culinary results, but more critically, putting your fingers at risk.
Beyond the immediate safety concern, a warped board also presents hygiene challenges. Uneven surfaces can create pools of liquid and trap food particles in depressions, making proper cleaning and drying almost impossible. Moisture can linger in warped areas, fostering bacterial growth. If your board resembles a miniature skateboard or a topographical map of rolling hills, it’s time for it to retire. Its physical deformation compromises both your safety and your kitchen’s hygiene. Trust the wisdom of the warped board; it’s telling you it’s done its duty.
The Smell Test: Your Nose Knows Best When it Comes to Board Safety
Sometimes, the most reliable indicator of a board past its prime isn’t what you see, but what you smell. If, after thorough washing and even dedicated deodorizing treatments, your white plastic cutting board continues to emit a persistent, unpleasant odour (a sour, musty, or vaguely “off” smell), it’s a definitive sign that bacteria or mould have taken up permanent residence. These smells are often metabolic byproducts of microbial activity, meaning you’re literally smelling germs at work.
This is particularly true for boards frequently used with strong-smelling foods like fish, garlic, or onions. While some initial odour is normal, a lingering, foul smell after cleaning indicates that the odour-causing molecules, and likely the bacteria producing them, are deeply embedded within the plastic’s pores and grooves. Your nose is a powerful detection tool for pervasive contamination. Don’t ignore it. If your board smells perpetually “unclean,” it most likely is. So, you’ve mastered cleaning, understood replacement, but what are the common pitfalls that even seasoned home cooks fall into? Prepare for some surprising revelations…
ADVERTISEMENT
Common Blunders and Breakthroughs – Avoiding Pitfalls for Pristine Boards
Even with the best intentions, subtle mistakes in kitchen hygiene can undermine all your efforts. These aren’t always obvious errors; sometimes they are habits born of convenience, misinformation, or simply a lack of awareness about the specific properties of materials like white plastic. This section delves into common blunders that many home cooks make, inadvertently compromising their cutting boards’ cleanliness and their kitchen’s safety. But more importantly, it offers breakthroughs – simple shifts in perspective and practice that can elevate your hygiene game dramatically.
We’re talking about shedding outdated assumptions and embracing smarter, more effective routines. From the temperature of your water to the combinations of your cleaning agents, every detail matters. Prepare to uncover hidden traps and discover straightforward solutions that will revolutionize your approach to cutting board care. These insights aren’t just about cleaning; they’re about cultivating a meticulous mindset that ensures every corner of your kitchen supports optimal health. Are you ready to transform your common blunders into brilliant breakthroughs?
The Hot Water Trap: Why Extreme Temperatures Can Be Your Board’s Enemy
It seems intuitive: the hotter the water, the cleaner things get, right? While hot water is essential for effective cleaning and degreasing, extreme temperatures can actually be detrimental to your white plastic cutting board over time. Boiling water or consistently washing plastic boards in dishwashers on the highest heat setting can cause the plastic to warp, as previously mentioned. This warping not only makes the board unstable but also creates new crevices and distortions that are even harder to clean and sanitize effectively.
Moreover, excessively hot water can “cook” or set certain organic stains into the plastic, making them much more challenging to remove later. Think of it like cooking an egg; once the protein coagulates from heat, it’s much harder to dissolve. While using comfortably hot water for washing is recommended, avoid scorching temperatures that could deform the plastic or embed stains further. Lukewarm to hot tap water is sufficient for washing, reserving very hot water for rinsing and allowing chemical disinfectants to do their work at appropriate temperatures. Avoid the hot water trap; it’s a stealthy enemy of board longevity.
ADVERTISEMENT
Skipping Sanitization: The Costly Error Many Make
This is perhaps the most prevalent and costly error in home kitchen hygiene: mistaking “clean” for “sanitized.” Many diligently wash their cutting boards with soap and water, remove all visible food particles, and then consider the job done. However, “clean” merely means the absence of visible dirt. “Sanitized” means reducing the number of harmful microorganisms to a safe level. Soap and water are excellent for cleaning, but they are not effective sanitizers against all types of bacteria and viruses, especially those lurking in microscopic knife marks.
Skipping the sanitization step, particularly after cutting raw meat, poultry, or fish, leaves behind a dangerous invisible threat. It’s an open invitation for foodborne pathogens to proliferate and cross-contaminate your next meal. Regular, deliberate sanitization using bleach solution, hydrogen peroxide, or even a robust vinegar treatment (depending on the level of contamination and board material) is non-negotiable for true kitchen safety. This often-skipped step is the bridge between a tidy kitchen and a truly healthy one. Don’t fall into this trap; your health depends on it.
Mixing Cleaning Agents: A Potentially Dangerous Mistake
In a zeal for ultimate cleanliness, some might be tempted to mix different cleaning agents together, thinking it will create a super-powerful solution. This is a potentially dangerous and often counterproductive mistake. For instance, mixing bleach with ammonia-based cleaners (found in some window cleaners or all-purpose sprays) creates toxic chloramine gas, which can cause severe respiratory problems and even be fatal. Similarly, mixing bleach with acidic cleaners like vinegar can produce chlorine gas, another highly dangerous substance.
Even less dramatic combinations can simply neutralize each other, rendering both agents ineffective, or create reactions that are corrosive to your surfaces or harmful to your skin. The rule of thumb is simple: never mix cleaning agents unless explicitly stated by the manufacturer for a specific product. Stick to using one powerful agent at a time, followed by a thorough rinse, before considering another. Respect the chemistry; it’s not a game of concoction, but one of careful, deliberate application. Your safety is paramount, especially when handling powerful chemicals.
ADVERTISEMENT
Neglecting Both Sides: The Unseen Battle on the Underside
It’s a common oversight: we focus so intently on the top surface of our cutting board – the side where the knife meets the food – that we often neglect the underside. This is a critical blunder. The underside of your white plastic cutting board is constantly in contact with your kitchen counter, which itself might not be perfectly clean. Moisture can get trapped underneath, creating a breeding ground for bacteria, mould, and mildew that can then transfer back to your counter or even seep around the edges to the top surface. It’s an unseen battle, often lost before it’s even acknowledged.
Whenever you wash your cutting board, make it a habit to scrub and rinse both sides thoroughly. Pay attention to the edges and any rubber feet or grips, as these areas can also trap grime and moisture. And always, always ensure both sides are completely dry before storing the board. Neglecting the underside is like cleaning only one side of a coin; the other side remains a hidden source of contamination. With these insights, you’re nearly a cutting board cleaning connoisseur. But there are a few insider secrets that will truly elevate your kitchen hygiene game…
The Insider’s Edge – Advanced Tips and Tricks for Ultimate Board Brilliance
You’ve navigated the basics, mastered the deep cleans, and learned to avoid common pitfalls. Now, you’re ready for the truly transformative knowledge – the insider’s edge that separates the merely clean kitchen from the truly brilliant one. These are the advanced tips, the surprising hacks, and the pro techniques that seasoned chefs and meticulous homemakers use to achieve unparalleled cleanliness and longevity for their white plastic cutting boards. They’re about leveraging common items in uncommon ways, optimizing processes, and thinking just a step ahead of the grime.
These aren’t just theory; they are actionable strategies that yield immediate, noticeable results, pushing your boards beyond just ‘clean’ to an almost ‘showroom new’ condition. From overnight power plays to crafting your own specialized cleaning agents, prepare to unlock a new level of kitchen hygiene that will not only impress but also provide immense satisfaction. These are the secrets they don’t teach you in basic cooking classes, designed to give you the ultimate advantage in the ongoing battle against kitchen contamination.
ADVERTISEMENT
The Overnight Soak Advantage: A Power Play for Deep Stains
For those truly stubborn, deeply embedded stains that resist even robust scrubbing and shorter soaks, the “overnight soak” is your secret weapon. This strategy leverages the power of prolonged contact time, allowing your chosen cleaning agent to work its way into the deepest pores and microscopic scratches of the plastic, breaking down pigments and killing deeply entrenched bacteria. It’s a low-effort, high-impact technique that often yields astonishing results, bringing back the bright white that you thought was lost forever.
After your initial wash, prepare a stronger-than-usual solution of bleach (e.g., 1 tablespoon per gallon of water, or 1/2 tablespoon per 2 litres) or a very strong baking soda paste mixed with lemon juice or hydrogen peroxide. Submerge your board completely in the bleach solution, or generously apply the paste to all stained areas. Leave it to soak or sit overnight (8-12 hours). The extended contact time allows the chemicals to penetrate deeply and dissolve the most tenacious stains. In the morning, rinse thoroughly and inspect your board. You’ll often find it remarkably cleaner, sometimes even pristine. This patience-driven power play is a game-changer for boards thought beyond redemption. It’s about letting time be your most potent cleaning ally.
The Dish Soap Duo: Enhancing Detergent Effectiveness
While dish soap is your daily warrior against grease and food particles, you can elevate its effectiveness, particularly against oily residues and light staining, by employing a simple “duo” technique. This involves using two types of dish soap, or rather, using one in two distinct phases. First, use a concentrated squirt of your regular dish soap directly onto the board, spreading it with a sponge and letting it sit for a few minutes before adding water. This allows the surfactants to attack grease directly without immediate dilution.
After this initial attack, add a small amount of hot water to the board and then apply another, smaller amount of dish soap. Now, scrub vigorously, creating a rich lather. This second application ensures fresh, active detergent is working as you scrub, lifting loosened particles. The initial undiluted contact provides a powerful punch, while the second lathering ensures thorough coverage and mechanical cleaning. This simple layering of dish soap application ensures maximum effectiveness for everyday cleaning, preventing minor issues from escalating into major problems. It’s a subtle but significant enhancement to your daily routine.
ADVERTISEMENT
DIY Cleaning Paste: Crafting Your Own Stain-Busting Concoction
For those who love a hands-on approach and want to customize their cleaning power, crafting your own DIY cleaning paste is an advanced technique worth mastering. This allows you to combine the abrasive power of baking soda with the acidic or oxidizing properties of other ingredients, tailored to the specific stain or challenge. The beauty is in the synergy; the ingredients work together to achieve results greater than the sum of their parts, without the dangers of mixing commercial chemicals.
A highly effective DIY paste can be made by combining baking soda with hydrogen peroxide to form a thick, spreadable consistency. For tougher, discoloured spots, add a squeeze of lemon juice to this mixture. The baking soda provides the gentle abrasion and deodorizing action, the hydrogen peroxide offers bleaching and sanitizing power, and the lemon juice adds an extra acidic kick for stain removal and fresh scent. Apply this paste generously, let it sit for 30 minutes to a few hours, then scrub with a non-abrasive brush, and rinse thoroughly. This custom concoction puts you in control, allowing you to fine-tune your cleaning attack. This insider tip empowers you to be your own cleaning chemist, delivering remarkable results.
The “Sacrificial Board” Strategy: A Pro Chef’s Secret Weapon
This isn’t a cleaning tip, but a preventative strategy that every serious home cook should adopt: the “sacrificial board.” Professional kitchens often use this concept to preserve their primary, high-quality cutting surfaces. The idea is to have one very inexpensive, easily replaceable white plastic board that you designate for the most abrasive, staining, or potentially damaging tasks. Think chopping raw beetroot, breaking down whole chickens, or mincing highly aromatic garlic or onions that leave strong, lingering smells.
This sacrificial board takes the brunt of the abuse, protecting your nicer, main boards from excessive knife marks, deep stains, and absorbed odours. When the sacrificial board becomes too deeply scarred, permanently stained, or irrevocably smelly, you simply discard it and replace it with another inexpensive one. This extends the life and pristine condition of your primary boards significantly, making the overall maintenance burden much lighter. It’s a smart, economical, and hygienic long-term strategy, ensuring your main boards remain in top condition for years to come. You’re armed with knowledge, strategies, and insider tips. But the true power lies in applying this consistently… and the rewards are greater than you think.
Your Kitchen’s Transformation – A Legacy of Cleanliness and Health
You’ve embarked on a journey that started with a simple white plastic cutting board and has blossomed into a comprehensive understanding of kitchen hygiene. You’ve uncovered the science behind stubborn stains, mastered powerful cleaning agents, learned to avoid common pitfalls, and gained access to insider tips that professional chefs cherish. This isn’t just about clean surfaces; it’s about transforming your entire relationship with your kitchen, elevating it from a mere food preparation area to a sanctuary of health and culinary delight. The dedication you show to your cutting boards will ripple through your entire cooking space, creating a legacy of cleanliness that impacts every meal and every moment.
The immediate gratification of seeing a gleaming, spotless board is undeniable, but the true reward goes deeper. It’s the peace of mind knowing you’ve minimized health risks, the efficiency of working on truly clean surfaces, and the sheer joy of a kitchen that feels effortlessly pristine. This isn’t the end of your journey, but rather a profound new beginning – a commitment to continuous vigilance and the pursuit of optimal kitchen health. Your cutting board is more than a tool; it’s a reflection of your commitment to excellence in the heart of your home. Are you ready to embrace the sparkling revolution?
The Ripple Effect: How a Clean Board Impacts Your Entire Kitchen
A truly clean and sanitized white plastic cutting board isn’t an isolated achievement; it creates a powerful ripple effect throughout your entire kitchen. When your primary food preparation surface is consistently hygienic, it reduces the likelihood of transferring bacteria to your hands, other utensils, countertops, and ultimately, to other foods. This breaks the chain of potential cross-contamination, making your entire cooking environment safer. It sets a higher standard for cleanliness that naturally extends to your other kitchen habits.
Moreover, a sparkling clean board elevates the aesthetic of your kitchen. It sends a visual signal of care and attention, inspiring you to maintain the same level of cleanliness across all your surfaces and tools. This positive feedback loop encourages better habits, making cleaning less of a chore and more of a natural extension of the cooking process. The pristine state of one essential tool can become the catalyst for an overall transformation, turning your kitchen into a haven of health and inspiring a newfound appreciation for meticulous hygiene.
The Psychological Boost: The Satisfaction of a Spotless Workspace
Beyond the undeniable health benefits, there’s a powerful psychological uplift that comes from working in a truly spotless kitchen, particularly with a gleaming white cutting board. It fosters a sense of calm, control, and pride in your culinary space. A clean environment reduces mental clutter, allowing you to focus more on the creative aspects of cooking rather than worrying about lurking germs or persistent stains. It’s a foundation of serenity that enhances the entire cooking experience, turning a routine task into a meditative practice.
The satisfaction of transforming a dingy, stained board into a bright, hygienic surface is incredibly rewarding. It provides a tangible sense of accomplishment, reinforcing the value of your efforts. This psychological boost isn’t just a fleeting feeling; it encourages consistency, making the pursuit of cleanliness an enjoyable and fulfilling part of your daily routine. A spotless workspace isn’t just about hygiene; it’s about mental well-being and finding joy in the small details of your home. It’s a subtle yet profound transformation.
Beyond the Board: Applying These Principles to Other Kitchen Tools
The principles you’ve learned for cleaning and sanitizing white plastic cutting boards are not exclusive to them. They are universal truths in kitchen hygiene that can be powerfully applied to a multitude of other kitchen tools and surfaces. The understanding of porosity, the power of pH, the importance of physical scrubbing, the necessity of sanitization beyond mere cleaning, and the critical role of thorough drying – these are foundational concepts that extend far beyond a single board. Think of your wooden spoons, your silicone spatulas, your stainless steel countertops, even your kitchen sink and drain.
Each material presents its own unique challenges, but the underlying philosophy remains the same: understand the material, identify its vulnerabilities, choose the right cleaning agent, and execute a thorough cleaning and sanitization process followed by proper drying and storage. This holistic approach ensures that your entire kitchen ecosystem is harmonious and healthy, not just isolated parts of it. Your mastery of cutting board cleaning is merely the starting point for a comprehensive revolution in your overall kitchen hygiene, making you an expert in proactive cleanliness.
The Continuous Journey: Making Hygiene a Habit, Not a Chore
Ultimately, the goal isn’t just to clean your white plastic cutting board once, but to integrate these practices into a continuous journey, transforming hygiene from a dreaded chore into a seamless habit. Consistency is the true key to maintaining a pristine and healthy kitchen. It’s about building micro-habits: immediate rinsing after use, regular deep cleaning sessions, proactive drying, and conscious storage. These small, consistent actions compound over time, making future cleaning efforts less demanding and more effective.
Embrace the philosophy that every meal prep offers an opportunity to reinforce these good habits. The more you practice, the more intuitive these steps become, until they are second nature. This continuous journey is an investment in your health, your peace of mind, and the longevity of your kitchen tools. It’s about cultivating a mindset where cleanliness is an integral, enjoyable part of the cooking experience, not an afterthought. The journey to a truly pristine kitchen is an ongoing one, but with these insights, you’re not just cleaning a board, you’re safeguarding your health and transforming your cooking experience. Are you ready to embrace the sparkling revolution?
