The Secret Ingredient for Unbelievably Crispy Fried Potatoes: A Vinegar Masterclass You Won’t Believe!
Imagine this: a plate piled high with golden-brown fried potatoes, each one boasting a shatteringly crisp exterior that yields to a fluffy, tender interior. This isn’t just a dream from a high-end restaurant; it’s a culinary reality within your grasp, right in your own kitchen. For years, home cooks and even seasoned chefs have wrestled with the elusive quest for the perfect fried potato, often ending up with a disappointing mound of limp, greasy, or unevenly cooked spuds. But what if I told you the secret to achieving that ultimate crispness lies not in exotic oils, fancy equipment, or complex techniques, but in a humble, everyday pantry staple? A liquid so common, you probably already have it sitting in your cupboard, waiting to revolutionize your potato game forever. Get ready to discover the astonishing power of vinegar, and prepare to have your mind, and your taste buds, completely blown.
This isn’t just another cooking tip; it’s a deep dive into the science, the art, and the sheer magic behind transforming ordinary potatoes into extraordinary culinary masterpieces. We’re about to unveil the precise methods, the hidden insights, and the ‘aha!’ moments that will elevate your fried potatoes from good to absolutely legendary. So, if you’re tired of soggy spuds and ready to unlock the true potential of everyone’s favorite side dish, keep reading. The journey to crispy perfection begins now, and trust me, you won’t want to miss a single, crunchy detail.
The Crispy Conundrum: Why Our Fries Fall Flat
We’ve all been there. The craving hits: hot, crispy, salty fried potatoes. We painstakingly cut, soak, and fry, only to pull them from the oil looking promising, but quickly turning into a sad, limp shadow of their former glory. What goes wrong? Why do restaurant fries consistently achieve that ethereal crunch while ours often resemble soft, oil-laden sponges? The answer lies in understanding the fundamental challenges of frying potatoes, challenges that, once mastered, pave the way for true perfection. It’s a battle against water and starch, two elements inherently present in every potato.
Potatoes are essentially miniature water balloons filled with starch. When exposed to hot oil, this water tries to escape, causing steam. If the steam gets trapped, it creates a soft, rather than crisp, texture. Simultaneously, the starch within the potato undergoes a process called gelatinization. Think of it like this: raw starch granules are hard and compact. When heated in water, they swell and burst, releasing starch molecules that then bond together, forming a gooey, sticky gel. This gelatinized starch is a major culprit behind a soft, gummy interior and a non-crispy exterior, particularly if not managed correctly. It forms a barrier that prevents proper moisture release and crisping.
Another common pitfall is the oil itself. Too low a temperature, and the potatoes absorb too much oil, becoming greasy and heavy instead of light and airy. Too high, and they burn on the outside while remaining raw inside. Overcrowding the fryer is another frequent mistake, instantly dropping the oil temperature and leading to uneven cooking and a universally disappointing result. These are the classic roadblocks that prevent home cooks from achieving that coveted, professional-grade crispness. But here’s where our journey takes an exciting turn, introducing a surprising solution that tackles these problems head-on, in a way you might never have considered. What if there was a simple pre-treatment that could fundamentally alter the potato’s structure, preparing it for the ultimate crisping experience? Stay with me, because the next revelation is truly a game-changer.
ADVERTISEMENT
The Unsung Hero: Vinegar’s Scientific Superpower
For centuries, vinegar has been celebrated for its tangy flavor and preserving qualities. It’s a staple in salads, marinades, and pickling jars. But its hidden prowess in the realm of fried potatoes is nothing short of miraculous. The secret lies in its acidity. When potatoes are soaked in a diluted vinegar solution, a subtle yet profound chemical transformation begins, setting the stage for unparalleled crispness. This isn’t just an old wives’ tale; it’s a validated scientific principle that leverages the very nature of the potato to achieve culinary excellence. Prepare to understand why this simple step can turn your spud struggles into crispy triumphs.
The Acid Advantage: How Vinegar Works Its Magic
At the heart of vinegar’s effectiveness is its pH. Vinegar is acidic, typically with a pH ranging from 2.4 to 3.4, depending on the type. When potato pieces are submerged in this acidic environment, two primary mechanisms come into play, both crucial for crisping. First, the acid in the vinegar begins to break down pectin, a complex carbohydrate that acts as the “glue” holding plant cells together. Pectin, especially when heated, can contribute to a softer texture. By partially breaking it down *before* frying, the potato cells become slightly more independent, allowing for better moisture release during cooking and a less starchy, more open structure for crisping.
Second, and perhaps even more critically, the acid interferes with starch gelatinization. As we discussed, starch swelling and bursting can lead to gumminess. The presence of acid during the initial soak and subsequent boiling (if you choose to pre-boil) helps to inhibit this process. Instead of turning into a sticky, amorphous gel, the starch remains more granular. This means that when the potatoes hit the hot oil, the surface starch can rapidly dehydrate and crisp up without forming an impenetrable, gummy layer. Think of it as creating microscopic channels within the potato that facilitate moisture evaporation, leaving behind a perfectly aerated, crunchy shell. It’s a subtle difference on a cellular level, but the impact on the final texture is monumental.
Now, while white distilled vinegar is typically the go-to for its neutral flavor profile and strong acidity, other vinegars like apple cider vinegar or rice vinegar can also work. Apple cider vinegar, with its slightly fruitier notes, might impart a very subtle background flavor that some find appealing, while rice vinegar is milder. The key is the acetic acid content. For the best results and a clean potato flavor, white distilled vinegar remains the champion. It’s truly astonishing that such a common ingredient can perform such a complex, beneficial function. But the benefits don’t stop at just crispness; there’s more to this acidic marvel.
ADVERTISEMENT
Beyond Crispness: Other Benefits of Vinegar Pre-Soak
While the primary objective of the vinegar soak is undeniably superior crispness, this humble kitchen hack offers a couple of delightful fringe benefits that elevate your fried potatoes even further. It’s these subtle enhancements that move your spuds from merely “good” to truly exceptional, proving that attention to detail, even with a simple ingredient, can yield profound results.
One often-overlooked advantage is a subtle flavor enhancement. While the goal isn’t to make your potatoes taste like vinegar (and rest assured, they won’t, as the acid dissipates during cooking), the pre-soak can impart a very slight, clean tang that brightens the overall flavor profile. It cuts through the richness of the oil, preventing the potatoes from tasting heavy or greasy. This slight acidity can actually make the potato’s natural flavor pop, providing a counterpoint that makes each bite more engaging and less monotonous. It’s the culinary equivalent of a dash of lemon juice on a dish – it doesn’t make it taste lemony, but it enhances everything else around it. This is particularly noticeable with plain salted fries, where the potato’s inherent flavor gets to shine.
Another fascinating benefit is the improvement in color. Potatoes soaked in vinegar tend to achieve a more uniform, appealing golden-brown hue when fried. This isn’t just about aesthetics; it’s an indicator of even cooking and proper caramelization of the sugars on the potato’s surface. Without the vinegar, uneven browning or patchy dark spots can occur, which are often signs of inconsistent moisture release or starch issues. The vinegar helps create a more consistent surface, allowing for beautiful, even coloration across every single fry. This visual appeal is crucial; after all, we eat with our eyes first! These additional benefits underscore why the vinegar soak isn’t just a gimmick but a fundamental step towards crafting the perfect fried potato. Now that you understand the “why,” let’s dive into the “how” – the precise, step-by-step master method that will turn theory into mouth-watering reality.
The Master Method: Step-by-Step Vinegar Soaking for Perfection
Knowledge is power, but application is magic. Now that you’re armed with the understanding of vinegar’s scientific prowess, it’s time to put that knowledge into practice. This section details the precise, step-by-step method for preparing your potatoes with a vinegar soak, ensuring every single piece emerges from the oil with that coveted, restaurant-quality crispness. Each stage is crucial, building upon the last to create the ideal foundation for frying. Skipping even one step could compromise the final texture, so pay close attention. Your journey to potato perfection is about to reach its most exciting phase.
Choosing Your Potatoes: The Right Foundation
Before you even think about slicing, the type of potato you choose plays a foundational role in the final crispness. Not all potatoes are created equal, especially when it comes to frying. For truly crispy fried potatoes, particularly French fries or wedges, you want a high-starch, low-moisture potato. The undisputed king in this category is the Russet Burbank potato, often simply called a “baking potato” in the UK or a “Idaho potato” in the US. Their fluffy texture and relatively low water content make them ideal for achieving that coveted crisp exterior and tender interior.
ADVERTISEMENT
Why Russets? Their high starch content, specifically amylose, is crucial because it promotes better caramelization and crisping. When cut and fried, these starches dehydrate beautifully, creating a sturdy, crunchy shell. Other varieties like Yukon Golds are more waxy and have a higher moisture content, making them better for boiling or roasting, but less ideal for deep frying if ultimate crispness is your goal. While you can still use them, the results won’t be as consistent or as shatteringly crisp as with Russets. For chips or very thin fries, you might consider a slightly lower-starch potato like Maris Piper in the UK, but for classic, satisfying fried potatoes, stick with the Russet. As for cutting, consistency is key: aiming for uniform thickness ensures even cooking. Whether you prefer thin shoestring fries, classic French fry sticks, or hearty wedges, make sure they are all roughly the same size to avoid some pieces burning while others remain undercooked.
The Exact Soaking Process: No Room for Error
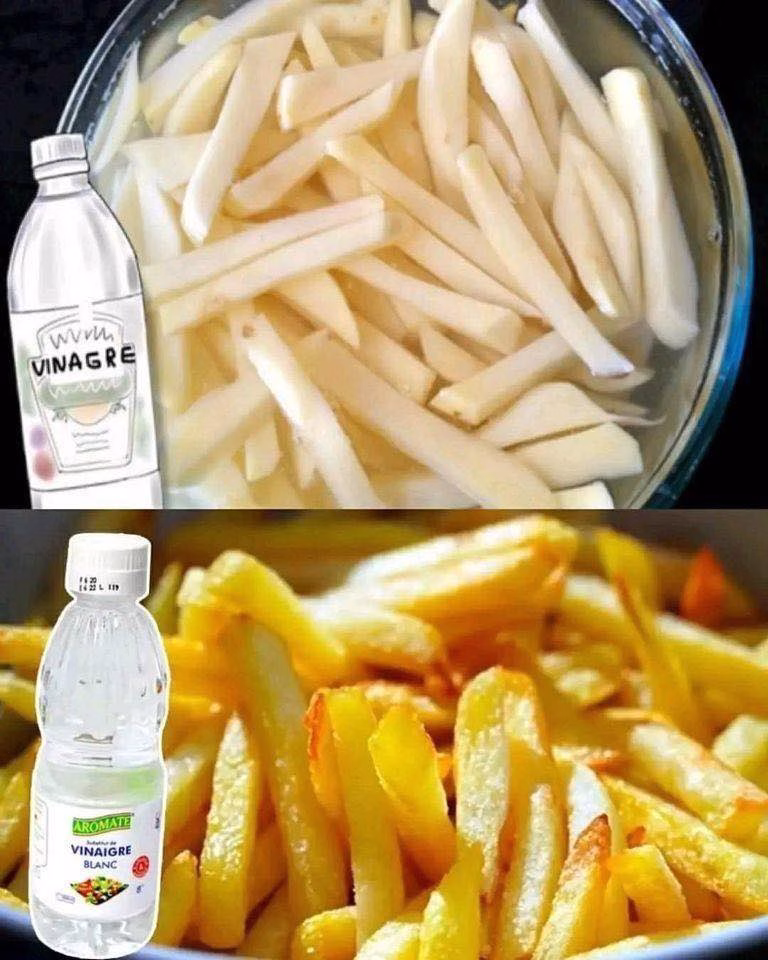
This is where the magic truly happens, and precision is your best friend. The vinegar soak isn’t just about splashing some liquid on potatoes; it’s a measured process that ensures optimal results. First, peel your chosen potatoes and cut them into your desired shape and size. As mentioned, consistency is paramount. For classic fries, aim for sticks about 1/4 to 1/2 inch thick. Once cut, immediately rinse the potato pieces under cold running water in a colander until the water runs clear. This initial rinse removes excess surface starch, which can lead to gumminess and prevent proper browning. It’s a quick but vital step.
Now, for the vinegar soak. Transfer the rinsed potato pieces to a large bowl. For every pound (approx. 450g) of potatoes, add about 1 to 2 tablespoons of distilled white vinegar. Then, cover the potatoes generously with cold water. The ratio is crucial: you’re looking for a dilute solution, not straight vinegar. Stir gently to ensure all potato pieces are submerged and the vinegar is evenly distributed. Let the potatoes soak for a minimum of 30 minutes, but ideally 1 to 2 hours. Some experts even recommend an overnight soak in the refrigerator for maximum effect. During this time, the acid in the vinegar will work its cellular magic, subtly altering the pectin and starch as described earlier. The water temperature should be cold; this helps keep the starches firm and prevents premature cooking. This soak is not a suggestion; it is the cornerstone of achieving crispy perfection. Each minute spent soaking is an investment in unparalleled crunch.
After the designated soaking time, drain the potatoes thoroughly. You’ll notice the water might be slightly cloudy, a sign that some starch has been drawn out. But here’s where many home cooks make a critical mistake that undoes all the previous good work: they don’t adequately dry their potatoes. This next step is perhaps the most crucial often overlooked, and it directly impacts whether your fries will be crispy or soggy. What happens if you skip it? You’ll create a steamy mess in your fryer, turning potential crispness into guaranteed disappointment. So, what’s the ultimate secret to taking your soaked potatoes from good to glorious? It’s all about what happens *after* the soak, and it’s simpler than you think.
ADVERTISEMENT
Drying is Key: Don’t Skip This!
You’ve meticulously selected your potatoes, precisely cut them, and patiently given them their transformative vinegar bath. You’re almost ready for the fryer, but pause. Before any oil comes into play, there is one absolutely non-negotiable step that separates the truly crispy from the disappointingly soggy: thorough drying. This isn’t just a suggestion; it’s a critical bridge between a successful soak and a triumphant fry. Any residual moisture on the surface of your potatoes will immediately turn into steam when it hits hot oil. This steam rapidly cools the oil around the potatoes, preventing proper crisping and leading to a greasy, limp result. It’s the enemy of crispness, and we must conquer it.
After draining your potatoes from the vinegar solution, transfer them onto several layers of clean paper towels or, even better, a clean kitchen towel. Pat them vigorously until they are as dry as humanly possible. Don’t be gentle; you’re trying to remove every last drop of surface moisture. Once patted, spread them out in a single layer on a wire rack set over a baking sheet. This allows for air circulation around all sides. If time permits, let them air dry for another 15-30 minutes, or even longer in front of a fan. The drier they are, the crispier they will become. Some professional chefs even go as far as to refrigerate the dried potatoes for an hour or two, as the cold air in the fridge further dehydrates the surface. This step is a hidden insight, often rushed or ignored, but it holds the key to unlock the true potential of the vinegar soak. It ensures that when your potatoes finally meet the hot oil, they are perfectly primed to develop that enviable, golden crust. With your potatoes now perfectly prepped and drier than the Sahara, it’s time to introduce them to their fiery destiny. But frying isn’t just about heat; it’s about technique, temperature, and timing. What’s the secret to achieving that deep, even golden color and shatteringly crisp texture in the oil? Get ready to master the art of the fry.
Frying Techniques for Gold-Standard Crispy Potatoes
With your potatoes now meticulously prepared and bone-dry, the stage is set for the grand finale: frying. This isn’t just an act of submerging potatoes in hot oil; it’s a delicate dance of temperature control, strategic batching, and knowing when to intervene. The frying process is where the vinegar’s work truly shines, transforming the prepped spuds into golden, crunchy perfection. But even with the best prep, improper frying can ruin everything. So, let’s unlock the secrets to a flawless fry, ensuring every potato piece achieves its crispy destiny.
The Oil Factor: Type, Temperature, and Quantity
The choice of oil is paramount. You need an oil with a high smoke point, meaning it can withstand high temperatures without breaking down and imparting off-flavors. Ideal choices include peanut oil, canola oil, vegetable oil, or grapeseed oil. Avoid olive oil or butter for deep frying, as their smoke points are too low. Quantity is also important: use enough oil to fully submerge your potato pieces, typically at least 3-4 inches deep in a heavy-bottomed pot or a deep fryer. This ensures consistent cooking and prevents overcrowding, which is the enemy of crispness.
ADVERTISEMENT
Now, let’s talk temperature – this is arguably the most critical element of successful frying. The secret to ultimate crispness is the “double-fry” method, a technique revered by chefs for its superior results. The first fry, or “blanching,” is done at a lower temperature, typically around 300-325°F (150-165°C). During this stage, the potatoes cook through, becoming tender on the inside, and their remaining moisture is slowly driven out without burning the exterior. This process typically takes 5-7 minutes. The potatoes should be pale yellow and soft, but not browned. Remove them from the oil and drain them on a wire rack. This initial fry sets the stage, allowing the interior to become fluffy. But the magic of the second fry is where that external shatter occurs. What exactly happens in that second, hotter dip that turns a mere potato into a masterpiece?
After the first fry, allow the potatoes to cool for at least 10-15 minutes, or even longer. This cooling period is crucial; it allows the internal moisture to redistribute and evaporate further, and it gives the surface a chance to dry slightly, preparing it for the intense heat of the second fry. Then, increase your oil temperature to a much hotter 375°F (190°C). This is the “crisping” fry. Return the blanched potatoes to the hot oil in small batches. This high temperature rapidly dehydrates the exterior, creating that incredible, glass-like crunch, and gives them their beautiful golden-brown color. This second fry typically takes only 2-4 minutes, so watch them closely. The temperature control throughout both stages is your ultimate secret to success. Too low on the first fry, and they’ll be greasy; too high on the second, and they’ll burn before crisping. Using a reliable kitchen thermometer is non-negotiable here. Without precise temperature, you’re merely guessing, and guessing rarely leads to perfection. But even with perfect oil, there’s a certain rhythm to the frying process itself that can make or break your batch. It’s about movement, space, and a watchful eye.
The Fryer’s Dance: Batching and Movement
You’ve got your perfect oil, at the perfect temperature, and your potatoes are primed. But before you dump them all in, remember the cardinal rule of deep frying: never, ever overcrowd the fryer. This is a common pitfall that instantly drops the oil temperature, leading to soggy, pale, and unevenly cooked results. Think of your fryer as a dance floor; you want enough space for each potato piece to move freely and cook uniformly. Fry your potatoes in small batches, allowing plenty of room between each piece. This ensures the oil temperature remains stable and high enough for optimal crisping. For a standard home deep fryer or large pot, this might mean frying only about a cup or two of potato pieces at a time, depending on their size.
Once your potatoes are in the hot oil (during both the first and second fry), don’t just leave them static. The “fryer’s dance” involves gentle stirring or shaking the basket periodically. This movement prevents the potatoes from sticking together and ensures that all surfaces are exposed to the hot oil, promoting even browning and crisping. For the first fry, gentle agitation is enough. For the second, more vigorous shaking of the basket or careful stirring with a spider strainer will help them develop that beautiful, uniform golden color and maximum crunch. An “aha!” moment for many home cooks is realizing that the perfect color isn’t just about doneness; it’s about the deep, rich caramelization that signifies maximum flavor and crispness. Don’t pull them out too early when they’re merely pale yellow on the second fry; wait for that truly golden-brown hue, almost bordering on light amber. This indicates that sufficient moisture has been driven out and the surface starches have caramelized beautifully. The visual cue is as important as the timer. Once they reach that perfect shade, it’s time for the final, critical step before serving: seasoning and draining, which can make all the difference in that initial, satisfying bite.
ADVERTISEMENT
Post-Fry Perfection: Seasoning and Serving
You’ve done it. Your potatoes are a glorious golden brown, emanating that irresistible aroma of freshly fried goodness. But the journey to crispy perfection isn’t quite over. The moments immediately after they emerge from the hot oil are crucial for locking in flavor and ensuring they remain crisp. This is where attention to detail truly pays off, transforming a good fry into an unforgettable one.
As soon as your potatoes are lifted from the oil, transfer them directly to a wire rack set over a baking sheet lined with paper towels. The wire rack is key; it allows air to circulate around all sides, preventing the bottom from steaming and becoming soggy. Resist the urge to pile them directly onto paper towels in a bowl, as this traps steam and undoes all your hard work. While they are still piping hot and glistening with oil, immediately sprinkle them generously with fine-grain salt. The heat and residual oil will help the salt adhere perfectly, ensuring every crevice is seasoned. Fine salt, such as table salt or popcorn salt, is ideal because its small granules stick better and dissolve more quickly than coarse sea salt, ensuring an even distribution of flavor. Don’t be shy with the seasoning; hot potatoes can take a surprising amount of salt, and it’s essential for enhancing their flavor and counteracting the richness of the oil.
Beyond plain salt, consider elevating your fries with other seasonings while they’re hot. A dash of garlic powder, onion powder, paprika, or even a sprinkle of finely chopped fresh herbs like rosemary or parsley can add another layer of complexity. Experiment with homemade seasoning blends – perhaps a spicy kick with cayenne pepper, or a cheesy flavor with grated Parmesan. These immediate additions meld with the hot potato, creating a truly gourmet experience. Serve your crispy fried potatoes immediately, while they are at their absolute peak of crispness and warmth. They are best enjoyed fresh from the fryer. While they can be reheated in a hot oven or air fryer to regain some crispness, nothing beats that initial, glorious crunch. So, gather your hungry audience, present your masterpiece, and prepare for the accolades. But what if, despite all your efforts, something still goes awry? Or perhaps you’re wondering how else this vinegar magic can be applied? The next section addresses common pitfalls and reveals even more surprising uses for your newfound vinegar expertise. Don’t stop now – the ultimate potato master still has more to learn!
Troubleshooting & Advanced Crisping Secrets
Even with the most detailed instructions, cooking can sometimes throw a curveball. Perhaps your fries aren’t quite as crisp as you’d hoped, or they’re turning out too dark. This section is your go-to guide for troubleshooting common issues and unlocking advanced insights that will solidify your status as a crispy potato connoisseur. We’ll cover how to fix less-than-perfect batches and then delve into creative ways to extend the vinegar principle beyond basic fries, proving just how versatile this kitchen hack truly is. Your journey to potato mastery is nearing its peak, and these final tips will ensure you conquer any culinary challenge.
ADVERTISEMENT
Common Pitfalls and How to Fix Them
Let’s address the frustrating moments that can occur, even with the best intentions. If your fried potatoes are coming out soggy or limp, despite the vinegar soak, the primary culprit is almost always moisture. Revisit the drying step: were they truly bone-dry before hitting the oil? If not, ensure you pat them vigorously and consider a longer air-drying period or even a brief stint in the refrigerator. Another factor could be overcrowding the fryer, which lowers oil temperature. Always fry in small batches, giving each potato piece ample space. If the oil temperature was too low during the second fry, it won’t be hot enough to rapidly dehydrate the surface, leading to a softer result. Invest in a good thermometer and stick to the recommended temperatures rigorously.
What if your potatoes are too dark or burning on the outside, but seem raw on the inside? This indicates the oil temperature was too high, especially during the first fry, or you fried them for too long. The exterior cooks too quickly before the interior has a chance to soften. Ensure your first fry is at the lower temperature (300-325°F / 150-165°C) and for a longer duration, allowing the insides to cook through. The second fry is quick and hot, purely for crisping and browning. Uneven browning can often be traced back to inconsistent cutting. If some pieces are thicker than others, they will cook at different rates. Strive for uniformity in your cuts. Finally, if they taste greasy, this is a sure sign of oil that wasn’t hot enough during either fry, leading to excessive absorption. A good thermometer and adequate batching are your best defenses against greasy fries. These insider tips, often learned through trial and error by professional chefs, can save you from culinary heartbreak and ensure consistent success.
Beyond Basic Vinegar: Creative Applications
Now that you’ve mastered the art of crispy fried potatoes with vinegar, why stop there? The principle of using acid to manage starch and promote crispness can be applied to other potato preparations, opening up a world of culinary possibilities. Consider roasting potatoes: a brief 15-30 minute soak of your cut roasting potatoes in a diluted vinegar solution (same ratio as for frying) before par-boiling or roasting them can yield remarkably crisper results. The acid works its magic, ensuring a delightful crunch on the outside of your roasties, elevating a traditional Sunday dinner side to new heights.
Another fascinating application is for potato salads or any dish where you want boiled potatoes to maintain a firm, non-gummy texture. Adding a tablespoon of vinegar to the boiling water when cooking potatoes for salad can help prevent them from becoming overly starchy and mushy. This subtle touch ensures your potato salad has distinct, well-textured potato chunks rather than a uniform, pasty consistency. It’s a little-known secret that professional caterers often use to ensure their potato salads hold up beautifully. Think about it: a crisp exterior and a fluffy interior aren’t just for fries anymore! This extends the utility of your newfound knowledge beyond deep-frying, turning you into a true potato whisperer. Did you know the average person in the UK consumes over 200 pounds of potatoes a year, while Americans consume around 120 pounds? With these techniques, every single one of those pounds can be a testament to culinary perfection. This isn’t just about cooking; it’s about transforming a staple into a star.
ADVERTISEMENT
Your Crispy Potato Journey: What’s Next?
You’ve embarked on an incredible culinary adventure, transforming a simple potato into a masterpiece of crispness and flavor. From understanding the science of starch and pectin to mastering the double-fry technique and troubleshooting common issues, you now possess the knowledge and skills to create truly legendary fried potatoes. This journey has hopefully provided you with more than just a recipe; it’s given you a deeper understanding of food science, an appreciation for precision, and the confidence to experiment and innovate in your own kitchen. But the learning doesn’t have to stop here. Culinary exploration is a continuous, delicious process, and your mastery of the vinegar trick is just the beginning.
Your challenge now is to put this knowledge to consistent practice. Experiment with different potato varieties, adjust soaking times, and play with your preferred level of crispness. Try infusing your soaking water with subtle aromatics like a bay leaf or a sprig of thyme for an even more complex flavor profile. Share your newfound secret with friends and family, and watch their amazement as they bite into your unbelievably crispy creations. Encourage them to try it themselves and compare notes. The joy of cooking is not just in the eating, but in the sharing and the continuous pursuit of perfection.
What unexpected ingredient might be the next secret weapon in your culinary arsenal? How else can you apply these scientific principles to elevate everyday dishes? The possibilities are endless when you approach cooking with curiosity and a desire for excellence. So, go forth, fry boldly, and continue to explore the delicious world around you. We’ve unlocked the ultimate secret to crispy fried potatoes, but remember, every perfect dish is an invitation to discover the next. What other culinary myths are you ready to debunk? The answer might be closer than you think, waiting in your pantry to be discovered.
