The Baker’s Secret Weapon: Unlocking the Brilliance of No-Knead Bread
From Novice to Artisan: Baking Extraordinary Bread with Astonishing Simplicity
For generations, the art of bread making has been revered as a culinary skill requiring immense patience, strength, and a nuanced understanding of dough. The very idea of baking a truly artisan loaf, with its crusty exterior and airy, open crumb, often conjures images of tireless kneading, precise measurements, and hours spent perfecting technique. This perception has, unfortunately, intimidated countless aspiring bakers, relegating the joy of homemade bread to the realm of seasoned professionals. However, a revolutionary technique emerged that shattered these traditional barriers, proving that extraordinary bread can be achieved with astonishing simplicity: the no-knead method. This brilliant approach leverages time, rather than brute force, transforming a handful of basic ingredients into a magnificent loaf that rivals those from the finest bakeries. If you’ve ever dreamt of pulling a warm, fragrant loaf from your own oven, without the arduous task of kneading, prepare to discover the genius behind this game-changing recipe that truly makes artisanal bread accessible to everyone.
ADVERTISEMENT
The Genius of No-Knead Bread: Why It Works So Well
The brilliance of no-knead bread lies in its elegant simplicity, fundamentally altering how gluten, the protein network that gives bread its structure, is developed. Traditional bread relies on vigorous kneading to align gluten strands, creating elasticity and strength. No-knead bread, conversely, employs a few clever tricks to achieve the same, if not superior, results with minimal effort.
1. Time Replaces Toil: Long Fermentation
ADVERTISEMENT
The cornerstone of the no-knead method is its extended fermentation period. By allowing the dough to rest for 12 to 18 hours (or even longer) at room temperature, the yeast slowly works its magic. During this prolonged period, enzymes naturally present in the flour begin to break down complex carbohydrates and proteins. This enzymatic activity, combined with the slow release of carbon dioxide from the yeast, allows the gluten strands to naturally align and develop without any physical manipulation. The slow pace also develops a richer, more complex flavor in the dough, a depth often found only in professional artisan breads.
2. High Hydration: The Wet Secret
No-knead bread typically uses a very wet, high-hydration dough. While this can feel counterintuitive for traditional bakers, the abundance of water is crucial. Water helps to fully hydrate the flour, allowing the gluten-forming proteins to easily slide past each other and form a strong, extensible network. It’s the water that facilitates the natural alignment of gluten strands over time, doing the work that kneading would otherwise accomplish. The high water content also contributes significantly to the open, airy crumb structure characteristic of artisan loaves.
ADVERTISEMENT
3. The Dutch Oven: An Oven Within an Oven
The other critical component that elevates no-knead bread to artisan quality is baking it in a preheated Dutch oven or a similar heavy, lidded pot. This technique creates a perfectly steamy environment around the dough during the initial baking phase.
- Steam for Crust: The trapped steam keeps the crust moist for the first part of baking, preventing it from setting too quickly. This allows the dough to expand maximally (the “oven spring”) before the crust hardens, resulting in a significantly larger and airier loaf.
- Perfect Crust: Once the lid is removed, the dry, intense heat of the preheated pot and oven creates an incredibly thick, crackly, and deeply caramelized crust that is the hallmark of a truly great bread.
By combining minimal effort, extended time, high hydration, and clever use of equipment, the no-knead method democratizes the art of baking exceptional bread, making it accessible and astonishingly rewarding for everyone.
ADVERTISEMENT
The Brilliant No-Knead Bread Recipe: A Step-by-Step Guide
This recipe’s brilliance lies in its simplicity, requiring just a handful of common ingredients and minimal active time. The bulk of the work is done by time, allowing you to focus on other things while magic unfolds.
Ingredients: (Yields one medium loaf)
ADVERTISEMENT
- 3 cups (about 360-380g) all-purpose or bread flour
- 1 ¼ teaspoons salt
- ¼ teaspoon instant or active dry yeast
- 1 ½ cups (about 360ml) cool water (around 60-70°F or 15-21°C)
Equipment:
- Large mixing bowl
- Plastic wrap or a clean kitchen towel
- Parchment paper
- Dutch oven (5-6 quart capacity) with a lid
Step-by-Step Instructions:
ADVERTISEMENT
- Mix the Dough (The Only “Work”): In your large mixing bowl, combine the flour, salt, and yeast. Stir with a spoon to ensure they are well mixed. Add the cool water and stir until all the flour is hydrated and you have a shaggy, sticky dough. There’s no need to knead; just make sure there are no dry spots of flour.
- First Rise (Bulk Fermentation – 12-18 Hours): Cover the bowl tightly with plastic wrap or a clean, damp kitchen towel. Let the dough rest at room temperature (ideally 68-72°F or 20-22°C) for 12 to 18 hours. The longer the rise (up to 24 hours in cooler temperatures), the more flavor will develop. The dough should be significantly risen, bubbly, and spring back slowly when poked.
- Prepare for Shaping (20 Minutes Before): After the long rise, generously flour a clean work surface (a cutting board or countertop is fine). Gently scrape the very sticky dough out of the bowl onto the floured surface. Avoid deflating it too much.
- Gentle Shaping (Minimal Handling): Lightly dust the top of the dough with flour. Using floured hands or a dough scraper, gently fold the edges of the dough towards the center to form a rough ball. Flip the dough over so the seam side is down, then gently cup it with your hands and pull it towards you, rotating it to create some surface tension. Don’t overwork the dough; this shaping takes less than a minute.
- Second Rise (Proofing – 30-60 Minutes): Prepare a bowl (or a proofing basket, known as a banneton) by lining it with a clean kitchen towel and generously dusting it with flour (rice flour works best for preventing sticking, but all-purpose is fine). Carefully transfer the dough, seam-side up, into the floured bowl/basket. Cover it loosely with plastic wrap or another towel. Let it rise for 30-60 minutes while your oven preheats. It should look somewhat puffy.
- Preheat the Dutch Oven (Crucial Step): About 30 minutes before your second rise is complete, place your empty Dutch oven (with its lid) in your oven. Preheat the oven to a high temperature, typically 450°F (232°C). Allow the Dutch oven to preheat for at least 30 minutes to an hour; it needs to be screaming hot.
- Transfer and Bake (Covered): Carefully remove the hot Dutch oven from the oven (use heavy oven mitts!). Gently lift the dough from its proofing bowl using the parchment paper (if using) or by carefully inverting it directly into the hot Dutch oven. Score the top of the dough with a sharp knife or razor blade if desired (a single slash or a cross cut works well). Immediately place the lid on the Dutch oven.
- Bake Covered: Bake with the lid on for 30 minutes. The trapped steam creates the perfect environment for maximum oven spring and a tender crust.
- Bake Uncovered: After 30 minutes, remove the lid. The bread should be noticeably risen and beginning to brown. Continue baking uncovered for another 15-25 minutes, or until the crust is deep golden brown and crispy. An internal temperature of 200-210°F (93-99°C) indicates doneness.
- Cool Completely: Carefully remove the bread from the Dutch oven and place it on a wire rack to cool completely before slicing. This is vital! Cooling allows the internal structure to set and prevents a gummy texture. It also helps achieve the ultimate crispy crust.
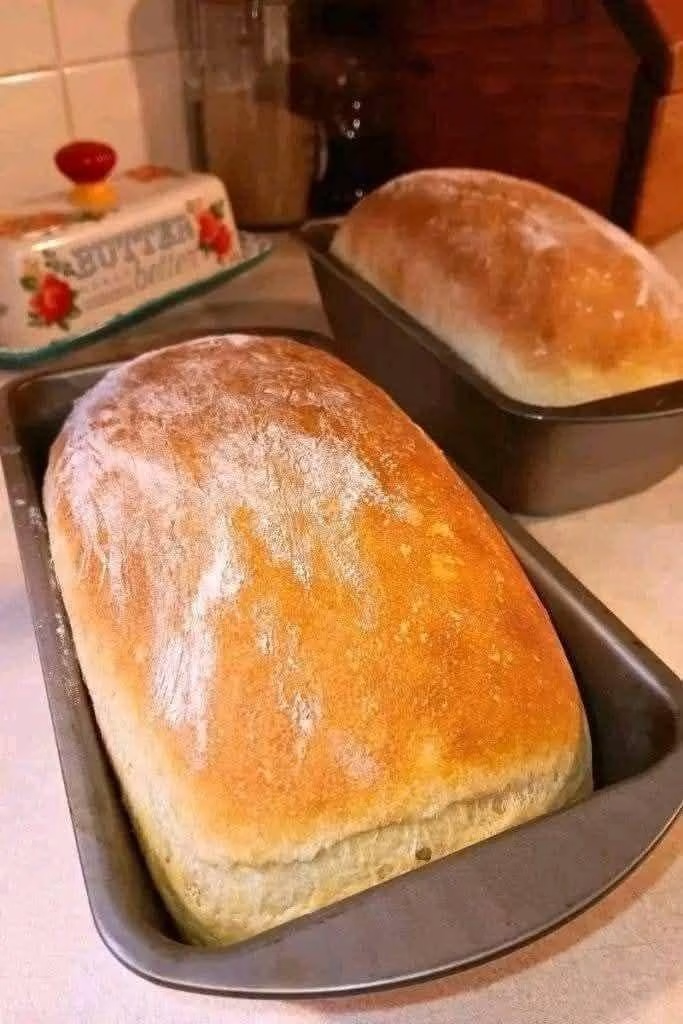
Achieving the Perfect Crust and Crumb: Masterful Results
The hallmark of truly brilliant no-knead bread lies in its sensational crust and airy, open crumb. These elements are directly influenced by a few key factors that leverage the unique properties of the dough and the baking environment.
ADVERTISEMENT
The Power of High Heat and Trapped Steam
The unparalleled crust of no-knead bread is primarily due to the intense, consistent heat and trapped steam provided by the preheated Dutch oven.
- Initial Steam: When the dough is transferred to the scorching hot Dutch oven and covered, the moisture from the dough itself, along with any external moisture (if you spritz or add ice cubes, which is optional), turns into steam. This steam prevents the outer crust from setting too quickly, allowing the dough to expand maximally – a phenomenon known as “oven spring.” Without this initial steam, the crust would harden prematurely, restricting the loaf’s rise and resulting in a denser crumb.
- Direct Heat for Crispness: Once the lid is removed, the direct, dry heat of the oven and the hot cast iron pan works on the now fully expanded dough. This intense heat promotes the Maillard reaction and caramelization of sugars on the surface, creating that characteristic deep golden-brown color and incredibly crackly, chewy, and robust crust.
Tips for an Even Crispier Crust:
ADVERTISEMENT
- Preheat Thoroughly: Ensure your Dutch oven has been preheating for at least 30-60 minutes. It needs to be screaming hot.
- Don’t Overproof: An overproofed dough might collapse in the oven, leading to a less open crumb and a weaker crust.
- Cool Completely: Resist the urge to cut into the bread immediately! Cooling on a wire rack allows residual heat to escape, moisture to redistribute, and the crust to become truly crispy. Cutting too soon traps steam, leading to a gummy interior and a soft crust.
Understanding the Crumb Structure: Open and Airy
The airy, irregular holes, or “open crumb,” that is so coveted in artisan bread is a direct result of the long, slow fermentation and high hydration of no-knead dough.
- Slow Gas Production: The minimal yeast, working over an extended period, produces gas bubbles slowly and steadily.
- Gluten Development: The high hydration allows the gluten network to relax and stretch around these gas bubbles without much interference, creating large, irregular pockets of air.
- Gentle Handling: The minimal handling during shaping ensures these delicate air pockets are preserved, not squashed out as they would be with vigorous kneading.
ADVERTISEMENT
Flavor Variations: Customizing Your Loaf
The basic no-knead bread recipe is a perfect canvas for countless flavor enhancements. Once you’ve mastered the plain loaf, feel free to experiment. Additions should be folded in during the initial mixing stage with the dry ingredients.
- Herbs and Aromatics:
- Rosemary & Garlic: Add 1-2 tablespoons of finely chopped fresh rosemary and 1-2 cloves of minced garlic to the dry ingredients.
- Italian Herbs: A tablespoon of dried Italian seasoning blend offers a classic savory touch.
- Cheeses:
- Parmesan or Asiago: 1/2 cup of grated hard cheese adds a salty, savory depth.
- Cheddar & Jalapeño: 1/2 cup shredded cheddar and 1-2 finely diced fresh or pickled jalapeños for a spicy, cheesy kick.
- Seeds and Grains:
- Sesame or Poppy Seeds: Add 1-2 tablespoons to the dough, and sprinkle more on top before baking.
- Mixed Seeds: Sunflower, pumpkin, flax seeds can add texture and nutritional value.
- Whole Grains: Substitute up to 1/4 or 1/2 cup of the all-purpose flour with whole wheat, rye, or spelt flour for a nuttier flavor and denser crumb.
- Sweet Additions:
- Cinnamon Raisin: Add 1/4 cup sugar (optional, as the bread is often served sweet), 1-2 teaspoons cinnamon, and 1/2-1 cup raisins or dried cranberries.
- Honey/Maple Syrup: A tablespoon of honey or maple syrup can be added to the water for a touch of sweetness.
Troubleshooting Common No-Knead Bread Issues
ADVERTISEMENT
Even with its simplicity, occasional issues can arise. Knowing how to troubleshoot them will build your confidence.
- Dough Not Rising (or not enough):
- Old or Inactive Yeast: Yeast can expire. Always check the expiration date and ensure it’s active before use.
- Too Cold Environment: If your kitchen is very cool, the fermentation will slow down significantly. Try placing the covered bowl in a slightly warmer spot (e.g., in an unheated oven with the light on, or near a warm appliance).
- Too Much Salt: Excess salt can inhibit yeast activity. Ensure accurate measurements.
- Too Hot Water: If you used active dry yeast and dissolved it in water that was too hot, it could have killed the yeast. Use cool water (as specified) for this method.
- Crust Not Crispy Enough:
- Oven Not Hot Enough/Dutch Oven Not Preheated: Ensure the oven and Dutch oven have ample time to reach the full baking temperature.
- Dough Too Wet: While it’s a high-hydration dough, extreme stickiness might indicate too much water. A slightly shaggy but manageable dough is ideal.
- Not Enough Steam: Ensure the lid of your Dutch oven seals well during the covered baking phase.
- Cutting Too Soon: As mentioned, cooling is crucial for crust development.
- Dense or Gummy Crumb:
- Too Much Flour: Accurately measure flour, preferably by weight. Too much flour results in a dry, dense dough.
- Under-Fermented: The dough didn’t rise long enough. It needs to be visibly bubbly and expanded before shaping.
- Over-Handling the Dough: Excessive manipulation during shaping can deflate the air pockets created during the long rise, leading to a denser crumb.
- Cutting When Warm: The internal structure isn’t fully set until the bread cools.
- Dough Sticking to Proofing Bowl/Basket:
- Insufficient Flour: Ensure your proofing bowl/basket is generously floured, especially with rice flour, which is less absorbent and prevents sticking better than all-purpose flour.
- Dough Too Wet: Again, a sign of too much water in the recipe.
Serving and Storing Your Homemade Masterpiece
Once your brilliant no-knead bread is out of the oven, the final step is perhaps the hardest: waiting!
ADVERTISEMENT
- Cool Completely: Allow the loaf to cool on a wire rack for at least 1-2 hours (or until completely cool to the touch). This step is non-negotiable for the best texture and crisp crust.
- Serving Suggestions: This bread is incredibly versatile. Enjoy it simply sliced with butter, olive oil, or your favorite jam. It’s fantastic for dipping into soups, stews, or olive oil and balsamic vinegar. Use it for gourmet sandwiches, toast, or bruschetta.
- Storage: Store cooled bread at room temperature, cut-side down on a cutting board, or in a paper bag for up to 2-3 days to maintain crust crispness. For longer storage, wrap tightly in plastic wrap or foil, or slice and freeze. Reheat frozen slices directly in a toaster for a quick, fresh-tasting piece.
Conclusion: The Accessible Art of Artisan Bread
The no-knead bread recipe is a revelation, a testament to the fact that culinary brilliance doesn’t always demand complex techniques or professional training. It demystifies the art of bread making, transforming it from a daunting task into an accessible and deeply satisfying endeavor. By leveraging the power of time, high hydration, and the simple genius of a Dutch oven, this method consistently yields a loaf with an astonishingly crispy crust and an irresistibly airy, open crumb. It’s a bread that not only tastes incredible but also fills your home with the comforting aroma of true craftsmanship. So, shed any lingering inhibitions about baking bread. Gather your simple ingredients, embrace the patience of the long fermentation, and prepare to pull a brilliant, golden-brown masterpiece from your oven. The joy and pride of creating such an extraordinary loaf with so little effort will undoubtedly make no-knead bread your new favorite kitchen secret.
